Peach Pecan Squares

img_2304-1

After a verrrrrrrrrrrrrry long hiatus, I’m back! (at least for now)  This has been a busy year with a move to Ohio, starting a new fellowship, making new friends and additionally, I lost the really sunny patio space I was lucky to be able to use for my photography “studio” in Boston.  This week after a minor baking spree, I finally found motivation (and a small sunny corner in my apartment) to photograph food and blog again.

My baking spree was inspired by The Peach Truck.  As a New Englander, I had no idea about the amazing deliciousness that is The Peach Truck. This company was started by a husband and wife team out of Nashville, to spread the joys of Georgia peaches every summer.  They run a tour a few times each summer selling boxes of peaches in several southern and midwestern cities.  Luckily, one of the stops is Columbus!

I decided I HAD to buy a 25 pound box (this is the minimum that you can purchase) and go crazy making peach EVERYTHING!  And yes, I of course waited in an about 100 person long line for them (it moved quickly). So far I have made peach lambic sorbet (courtesy of Jeni’s Ice Cream), peach liqueur (still infusing), peach, tomato, and burrata salads, and these peach pecan squares which are a slight modification of these smitten kitchen apricot pistachio squares.  The brown color of the pecan aren’t quite as pretty as the green of the pistachios but they are delicious!  Next baking projects are a peach creme fraiche pie and ginger peach muffins.  And I’ll still have a lot more peaches to go….

img_2299-1

Peach Pecan Squares (from smitten kitchen apricot pistachio squares)

Crust
1 cup (125 grams) all-purpose flour
1/4 teaspoon table salt
1/4 cup (50 grams) granulated sugar
1/2 cup (4 ounces or 115 grams) unsalted butter, cold is fine

Filling
3/4 cup (a scant 4 ounces or 110 grams) pecans
1 tablespoon (10 grams) all purpose flour
Few pinches of sea salt
6 tablespoons (75 grams) sugar
5 tablespoons (70 grams) unsalted butter, cold is fine
1 large egg
1 pound peaches

Heat your oven to 350 degrees F. Cut two 12-inch lengths of parchment paper and trim each to fit the 8-inch width of an 8×8-inch square baking pan. Press it into the bottom and sides of your pan in one direction, then use the second sheet to line the rest of the pan, perpendicular to the first sheet. (If you have an 8-inch square springform, you can skip this and just butter it well.)

Make the crust: Combine the flour, salt and sugar in the bowl of a food processor. Cut the butter into chunks, and add it to the bowl, then run the machine until the mixture forms large clumps — that’s right, just keep running it; it might take 30 seconds to 1 minute for it to come together, but it will. Transfer the dough clumps to your prepared baking pan and press it evenly across the bottom and 1/4-inch up the sides. Bake for 15 minutes, until very pale golden. For the sake of speed, transfer to a cooling rack in your freezer for 10 to 15 minutes while you prepare the filing.

Make the filling: In your food processor bowl (which I never bother cleaning between these steps), grind your pecans, sugar, flour and salt together until the nuts are powdery. Cut the butter into chunks and add it to the machine. Run the machine until no buttery bits are visible. Add the egg, blending until just combined.

Spread filling over mostly cooled (warmth is okay but it’s hoped that the freezer will have firmed the base enough that you can spread something over it) crust. Cut peaches in half and remove pits. Cut them into strips, then slide each cut half onto a butter knife or offset spatula, tilt it so that it fans a little, and slide it onto your pecan filling decoratively.

Bake the bars for 60 minutes, or until they are golden and a toothpick inserted into the pistachio portion comes out batter-free. This might take up to 10 minutes longer depending on the juiciness of your apricots and the amount you were able to nestle in. Let cool completely in pan; you can hasten this along in the fridge.

Cut bars into squares — chilled bars will give you the cleanest cuts. Keep leftover bars chilled.

img_2301-1

img_2307-1img_2308-1


Roasted Beets with Pistachio Beet Green Pesto, Honey Yogurt, and Blood Orange Vinaigrette

img_7690

Last weekend was one of my favorite holidays-Passover.  Something about Passover just immediately brings me back to my childhood.  All it takes is the smell of chicken soup simmering away on the stove or the pungent smell of horseradish and I am instantly transported back to my home in Western Massachusetts where I can envision a mini-version of myself, wearing one of my nicest dresses, setting the dinner table before the seder.  Since I graduated from college, I have made it a point to cook a Passover dinner every year that I have been in Boston (except last year when I was interviewing all over the country) and every year I cook almost the same menu: brisket, matzoh ball soup, and chocolate flourless cake from the April 2006 issue of Bon Appetite magazine.  Each year I refine the dishes a little more and try to add something new to the dinner.  A few years ago I invented chocolate covered matzoh ice cream which was such a hit, I have made it again every year since then!  This year I added in a ribbon of the hot fudge from the hot fudge thumbprints I made earlier this month.  Other recipes such as the charoset ice cream with Manischevitz sauce were not as well received.

This year, I wanted to add some color and vegetables to the table so I set out to make my first beet dish ever!  I actually didn’t really like beets until a few years ago which is probably why I never learned to make them.  However, after repeatedly trying them they found their way into my heart and I realized that their earthy taste eventually gave way into a sweetness that paired perfectly with tart and creamy flavors (like goat cheese or yogurt).  I decided to get creative with my roasted beets and created multiple components to add varied textures and flavors to the beets.

In full disclosure, I hadn’t planned on posting the recipe on my blog.  However, after multiple people requested the recipe after seeing the photos that I posted, I racked my brain for the ingredients and proportions and below is what I came up with.  Therefore, if you make it, taste is as you go (as you always should) and adjust as necessary!

Roasted Beets with Pistachio Beet Green Pesto, Honey Yogurt, and Blood Orange Vinaigrette

(serves 6-8 people)

Roasted beets:
8-10 medium sized beets of varying color
olive oil
salt

Pistachio beet green pesto:
1/4 cup pistachios (plus more to top the final dish)
1/2 cup packed chopped beet green leaves
1 small piece of garlic
1/4 cup of oil
salt

Blood orange vinaigrette:
2 blood oranges
1 Tbs honey
1/4 cup olive oil
salt

Honey yogurt:
10 oz (2 small containers) greek yogurt
2 Tbs honey

For the roasted beets: Preheat the oven to 400 degrees.  Rub beets with olive oil and salt.  Wrap beets of same color together in foil packets so they are sealed.  Place on a rimmed baking sheet and bake 45-60 minutes until they are fork tender.  Cool for 10 minutes and then run under cool water and remove the skins.  Cut into 4-6 wedges depending on the size of the beets.

For the pesto: Place first 3 ingredients in a mini food processor.  Slowly add oil until pesto is of a consistency that can be easily drizzles over the beets.  Season with salt.

For the vinaigrette:  Supreme or slice the blood oranges.  Reserve any juice that accumulated while cutting and then squeeze the remnants of the oranges to get more juice.  Whisk in honey, olive oil and salt.

Honey yogurt: Mix honey and yogurt together.

Assembly.  Spoon yogurt as the first layer on a large plate.  Drizzle with a few spoonfuls of pesto.  Top with the cut beets and blood orange segments/slices.  Top with a few more spoonfuls of drizzled pesto.  Spoon the vinaigrette over the beets.  Top with chopped, toasted pistachios if desired and herbs such as parsley or dill (if desired).

img_7678-1

img_7671


Hot Fudge Thumbprints

Every so often you come across something new and amazing that changes your life forever.  For me…it was this cookie.  You might think I’m being a bit dramatic waxing poetic about a cookie.  But this cookie was beyond incredible.  Probably the best cookie I have ever had and I’ve had my fair share of cookies.

I had wanted to try Mindy’s Hot Chocolate, a bakery and cafe owned by James Beard Award-winning pastry chef, Mindy Segal, for some time.  However, its Wicker Park location in Chicago was just a touch out of the way on each of my visits.  A few weeks ago, however, I was in Chicago for a conference and discovered Revival Food Hall. Revival Food Hall is a foodie’s dream with several of Chicago’s best fast-casual concepts all under one roof!  Everything looked and smelled delicious and I definitely wandered around for a good half hour before deciding what I wanted to eat.

However, when I stumbled upon a small Mindy’s Hot Chocolate outpost, there was no hesitation about where I was going for dessert.  Deciding what to order was a bit harder, though, because I wanted it all!!! Eventually with some help from the friendly staff I decided on a chocolate chip cookie, a Buckeye bar (aka peanut butter and chocolate goodness), $8 hot chocolate (yes $8 but TOTALLY worth it), and finally, these life-changing Hot Fudge Thumbprint cookies.  They essentially taste like you took the best and richest hot chocolate you can find (like their $8 version) and somehow condensed it into a soft and fudgy cookie.  Wow!  As soon as I tasted it I knew I need to learn how to make them and immediately bought Mindy Segal’s cookbook, Cookie Love, online.

The cookies are a bit labor intensive and start with you making about 4 cups of hot fudge (you only need about 1 cup for the recipe so you can make more cookies with rest or use it as ice cream topping…or just eat it with a spoon because it is that good).  My hot fudge didn’t quite separate the way it is described in the recipe but after about an hour of simmering (which is longer than what is called for in the recipe) it seemed like it was as done as it was going to get!  I made these over 2 days so that the dough could rest overnight.  I also added some extra sea salt to the top (because salty and sweet in the best combination) and coated the cookies in green sugar since it was St. Paddy’s Day that weekend.  Everyone at work raved about these cookies so I will definitely be making them again!  Recipe below is provided by Eater.

Hot Fudge Thumbprints (By Mindy Segal, Cookie Love):
Makes about 54 cookies

COOKIES
1 cup (8 ounces) unsalted butter, at room temperature
1 ⅓ cups granulated sugar
1 extra-large egg, at room temperature
1 extra-large egg yolk, at room temperature
2 tablespoons heavy cream
1 teaspoon pure vanilla extract
2 cups unbleached all-purpose flour
1 cup Dutch-processed cocoa powder
1 teaspoon kosher salt
½ teaspoon sea salt flakes

FOR SHAPING AND FILLING
1 heaping cup smoked sugar or demerara sugar
1 cup Hot Fudge (page 236)

To make the cookies:

• In the bowl of a stand mixer fitted with the paddle attachment, mix the butter briefly on medium speed for 5 to 10 seconds. Add the sugar and beat together until the butter mixture is aerated and pale in color, approximately 4 minutes. Scrape the sides and bottom of the bowl with a rubber spatula to bring the batter together.
• Put the egg, yolk, heavy cream, and vanilla into a small cup or bowl.
• In a bowl, whisk together the flour, cocoa, and salts.
• On medium speed, add the egg and yolk to the butter mixture and mix until the batter resembles cottage cheese, approximately 10 seconds. Scrape the sides and bottom of the bowl with a rubber spatula to bring the batter together. Mix on medium speed for 20 to 30 seconds to make nearly homogeneous.
• Add the dry ingredients all at once and mix on low speed. Mix until the dough comes together but still looks shaggy, approximately 30 seconds. Scrape the sides and bottom of the bowl to bring the batter together. Mix for another 10 seconds on medium speed. Remove the bowl from the stand mixer. With a plastic bench scraper, bring the dough completely together by hand.
• Transfer the dough to a sheet of plastic wrap and pat into an 8-inch square. Wrap tightly and refrigerate until firm, at least 2 hours or preferably overnight.
• Heat the oven to 350°F and line a couple of half sheet (13 by 18-inch) pans with parchment paper.

To shape the cookies:
• Cut the dough into 6 even strips. Roll the strips back and forth into logs to round out the edges. Sprinkle the smoked sugar on the work surface and roll the logs in the sugar to coat. Using the top half of your thumb as a guide, cut each log into 9 pieces but keep the log together. Roll the logs again to round out the edges, then pull the pieces apart and place cut-side up on the prepared pans, evenly spacing up to 20 cookies per pan. With the tip of your index finger, make an indentation in the center of each cookie.
• Bake one pan at a time for 8 minutes. Remove the pan from the oven and tap down the centers with the rounded end of a wooden spoon or a cocktail muddler. Rotate the pan and bake until the cookies have slight cracks on the top and are set, another 4 to 6 minutes. When ready, the cookies will have set around the edges and you will be able to gently move them. Let the cookies cool completely on the pan. Repeat with the remaining pan.

To fill the cookies:
• Heat the hot fudge briefly in a pot over high heat until the sides start to melt. Stir well, then transfer to a squeeze bottle or have a teaspoon ready.
• Once the cookies are completely cool, squeeze enough hot fudge onto the cookies to fill the indentation or spoon the hot fudge into the center. Refrigerate the cookies until the hot fudge has set, approximately 30 minutes.

The cookies can be stored in an airtight container at room temperature for up to 3 days or in an airtight container in the refrigerator for up to 1 week. Dough can be refrigerated for up to 1 week.

Hot Fudge

Makes a generous 4 cups

Hot fudge was one of the first things I learned how to make in my early days as a pastry cook (thank you, Judy Contino), and I’m still fascinated by the alchemy of the process. Chocolate, sugar, syrup, and cream are simmered until the oils separate from the solids. At first it looks like chocolate gone wrong, but then I add butter and a generous helping of vanilla and whisk the whole thing thoroughly. The hot fudge magically comes together. Because the chocolate and cream need to cook for a while, use a sturdy pot to avoid scorching the bottom. Once made, the hot fudge lasts for weeks and weeks in the refrigerator.

3 cups heavy cream
1 ¾ cups granulated sugar
2 tablespoons golden syrup (such as Lyle’s, see page 269) or light corn syrup
4 ounces unsweetened chocolate, broken into pieces
1 ½ teaspoons kosher salt
¼ cup (2 ounces) unsalted butter, at room temperature
2 tablespoons pure vanilla extract

• In a 6-quart or larger heavy pot over medium-high heat, combine the cream, sugar, and syrup until dissolved, approximately 3 minutes. Add the chocolate and salt and bring to a boil. Lower to a gentle simmer so that the bubbles percolate in the center of the pot. Cook, stirring periodically to avoid scorching the bottom, until the mixture breaks and the oils separate from the solids, 40 to 45 minutes.
• Whisk in the butter and vanilla thoroughly (you can also use an immersion blender to do this if you want it extra smooth) and let cool.

Hot fudge keeps in the refrigerator for up to 6 months.

Black Bottom Coconut Cream Pie

img_7415

Yesterday (March 14th) was one of the best holidays of the year (IMO): Pi day!!!  I remember first celebrating this holiday in high school in my pre-algebra class.  In honor of this momentous holiday, we held a pie making contest.  At this point in my life, my love for food and baking was only just beginning and my culinary adventures were mostly limited to easy things like chocolate chip cookies, pizza, scrambled eggs, and brownies.  I remember searching through one of my mom’s Pillsbury cookbooks and settled on a chocolate cherry pie with a traditional pie crust and a filling that essentially combined instant chocolate pudding and cherry pie filling.  It was quite amateur at best, but somehow I won, mostly because people couldn’t quite figure out what was in it and were curious to find out more.  My baking and pie making skills have come quite a long way since then… I would shudder at the thought of using a canned filling now!

This year, Pi day happened to fall the day after a huge snow storm.  Nothing gets me more in the mood for baking than inclement weather!  Luckily I was able to leave work a little early because I had an ambitious pie in mind: coconut cream pie!  Since returning from Thailand, I’ve been on a coconut kick and had some coconut milk and cream on hand.  I also had some milk, cream, and cream cheese leftover from the last batch of ice cream I made so I didn’t need to brave the blizzard to buy ingredients.  I then decided to add a chocolate (black) bottom layer to it because chocolate makes everything better. All of this culminated together in this newest creation: Black Bottom Coconut Cream Pie.  What is beautiful about this pie is that it layers rich chocolate, with a sweet coconut pudding, and a light, salty, but only slightly sweet, whipped topping.  It is neither too coconutty (this was tested on a coconut hater) nor too sweet.  It really is the perfect harmonious blend of sweet and salty with chocolate and coconut.  Hope you all had a delicious Pi Day!

Small confession: This crust recipe is actually supposed to make 2 pie crusts but I messed up, in a good way, and just made one.  The crust is one of my favorite parts so in my mind, more crust is better! If you want a thinner crust (or less butter in a slice of pie), then just use half of the pie dough and reduce the baking time.

img_7401

Black Bottom Coconut Cream Pie

Ingredients:

Crust (From Epicurious):

2 1/2 cups all purpose flour
1 tablespoon sugar
3/4 teaspoon salt
1 cup (2 sticks) chilled unsalted butter, cut into 1/2-inch cubes
6 tablespoons (about) ice water

Coconut Pudding (adapted from Epicurious):

2/3 cup sugar
1/4 cup cornstarch
1/2 teaspoon salt
4 large egg yolks
1.5 cups whole milk
1 can (14 oz) coconut milk
2 tablespoons unsalted butter, softened
1 teaspoon vanilla
1/2 tsp salt


Chocolate layer:

4 oz chocolate, chopped
1/2 cup whipping cream
1 Tbs butter
vanilla

Coconut Whipped Topping:

1/2 cup whipping cream
the top creamy/firm part from a 14 oz can of coconut cream (it is best to chill the can for a few hours and then just scoop out the top creamy part and leave behind the coconut water and reserve for another use)
4 oz cream cheese, softened
1/4 cup powdered sugar
1/2 tsp salt

Coconut Topping:

Dang toasted coconut chips or toasted shredded coconut (enough to cover pie)

Instructions:

Preheat oven to 350 degrees.

Thai Iced Tea Ice Cream

img_7336

It may seem weird to be posting about ice cream when there is an impending snow storm but a) I’m from Massachusetts and we loooooove ice cream no matter the temperature (we are one of the top 10 ice cream consuming states) and b) this ice cream is soooo good and tastes just like Thai Iced Tea!

Last month I went on an amazing vacation to Tokyo, Thailand, and Vietnam.  It was a whirlwind trip, visiting 5 cities in 2 weeks!  We visited museums and temples, went island hopping off the coast of Thailand, hiked, took cooking classes and of course ate A LOT of delicious food.  In Thailand, food is super cheap (aka $3 for a large lunch) and amazingly tasty with many fresh herbs and spices.


One of my favorite things about Thailand was that everywhere you turned there were vendors selling fresh fruit, coconut water, and Thai iced tea- each for less than a dollar!  I probably had at least 1 coconut and 1 Thai iced tea everyday!  Predictably, upon returning home I’ve been going through Thai iced tea withdrawal.  After a few weeks of this I decided to take matters into my own hands and came up with the brilliant idea to make an ice cream with Thai iced tea (well not that brilliant since others have done so before me…).  I found Thai iced tea mix online and set out to experiment with it this past weekend.  As I’ve posted before, I love Jeni’s Splendid Ice Cream (coincidentally, I will be moving to Columbus, Ohio in a few months where they are based!) and all of my ice cream creations are based on their recipes.  I used their basic algorithm but infused the milk mixture with Thai iced tea and then substituted all the sugar and some of the cream for a can of sweetened condensed milk.  The result is a perfectly creamy, frozen version of Thai iced tea that transports me back to the colorful and vibrant streets of Chiang Mai.


Thai Iced Tea Ice Cream

1/4 tsp. kosher salt
3 oz. cream cheese, softened
2 cups milk
1 Tbs and 1 tsp cornstarch
1 cup heavy cream
1 can (14 oz) sweetened condensed milk
1/2 cup Thai iced tea mix

img_7329

In a large bowl, whisk together cream cheese and salt, set aside.

In a bowl, stir together 1/4 cup milk and the cornstarch; set slurry aside.

In a 4-qt. saucepan, whisk together remaining milk and the cream, sweetened condensed milk, and thai iced tea mix.  Bring to a boil over medium-high heat. Cook for 4 minutes and then let steep for 10 minutes.  Strain mixture through a fine mesh sieve lined with one layer of cheesecloth (you can do it without cheesecloth but you’ll get some flecks of tea in it).  Reheat to a simmer and then stir in milk-cornstarch slurry. Return to a boil and cook, stirring, until thickened, about 2 minutes.

Whisk milk mixture into the cream cheese until smooth.  Pour mixture into a plastic bag; seal, and submerge in a bowl of ice water until chilled, about 30 min.

Pour mixture into an ice cream maker; process according to manufacturer’s instructions. Place into a storage container and freeze at least 1 hour before eating.

img_7332

img_7313

img_7321

Chocolate Tahini Challah Buns (from Smitten Kitchen)

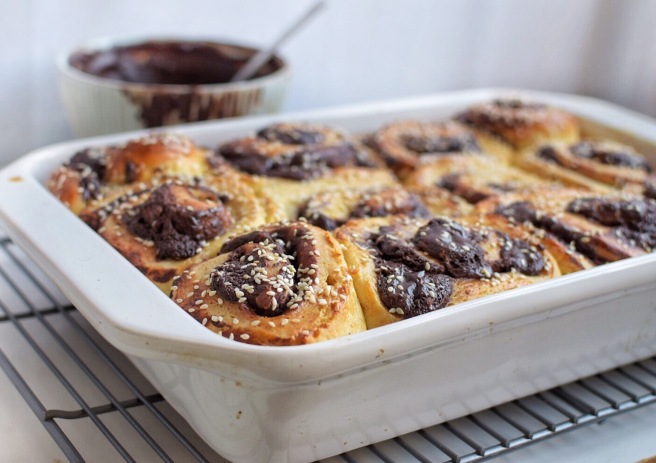
The other weekend on a whim, I decided to tackle a baking project that had been on my list for a while: these chocolate tahini challah rolls by Smitten Kitchen.  I have been gravitating more towards tahini in desserts so these caught my eye.  Last year I made these tahini molten cakes for dessert after a Middle Eastern themed dinner and they were delicious.  For those unfamiliar with tahini, it is a sesame paste that is akin to a natural peanut butter but with a nuttier taste to it.  It is often used in Middle Eastern cooking (aka hummus) but has been trending in a lot of desserts lately (see the My Name is Yeh blog).

I figured anything with chocolate, tahini and challah couldn’t go wrong!  This recipe was pretty simple but does require some advanced planning and time (mostly inactive time waiting for the dough to rise).  They are best served warm, in my opinion.  Enjoy!

img_4653

Chocolate Tahini Challah Buns

DOUGH
    • 2 large eggs
    • 1 large egg yolk
    • 1/4 cup (50 grams) granulated sugar
    • 1/2 cup (120 ml) vegetable or another neutral oil, or melted butter
    • 2/3 cup (150 ml) milk or water, plus an additional tablespoon if needed
    • 3 3/4 (490 grams) cups all-purpose flour, plus more for the counter
    • 1 packet (7 grams or 2 1/4 teaspoons) instant yeast
    • 1 1/4 teaspoons coarse or kosher salt
    • Butter or nonstick spray for baking pan
FILLING AND ASSEMBLY
    • 4 ounces (115 grams) dark (semi- or bittersweet) chocolate (or approximately 3/4 cup chocolate chips)
    • 1/2 cup (115 grams) unsalted butter, cold is fine
    • Scant 1/2 cup (25 grams) powdered sugar
    • 1/4 cup (20 grams) cocoa powder
    • 1/4 cup tahini (30 grams), well-stirred
    • 1 large egg, beaten
    • Sesame seeds
GLAZE (OPTIONAL)
  • 2 cups (240 grams) powdered sugar
  • 3 to 4 tablespoons lemon or orange juice
Make dough: Whisk eggs, yolk, sugar, oil and milk or water in the bottom of a stand mixer bowl. Add flour, yeast and salt and combine with dough hook until it comes together, then let machine knead it for 5 to 7 minutes. Oil a large bowl and let dough rise in it at room temperature for 2 to 2 1/2 hours, until slightly shy of doubled.You may need 30 to 45 minutes longer if your ingredients were cold. You can speed this process along by turning your oven on to 150 degrees F and turning it off and then placing bowl the dough inside. Keep an eye on it because it will rise more quickly.

Butter a 9×13-inch or equivalent size baking dish, or coat it with nonstick spray.

Make filling: Melt butter and chocolate together until smooth. Stir in powdered sugar, cocoa and tahini; mixture should be a spreadable consistency.

Assemble buns: On a very well-floured counter, roll out dough into a rectangle about 18 inches wide (side facing you) and as far away from you (i.e. length) as it comfortably goes, usually 12 to 15 inches. Dollop chocolate mixture over and spread it smooth. Roll dough in a tight spiral.

Cut log very gently — it’s going to be a soft mess, use a sharp serrated knife, sewing thread works well here too — into 1 1/2-inch to 2-inch segments. Arrange cut side up in prepared pan. Beat egg in small bowl. Brush tops of buns and tops of sides with egg and cover with plastic wrap. You can either fefrigerate overnight, along with leftover egg wash or leave it at room temperature to proof for another 60 to 90 minutes, until puffed a bit.

Bake buns: If in fridge, remove buns from fridge and let warm up for 30 minutes before baking. Heat oven to 350 degrees F. Brush tops tops of sides with egg with egg wash again (I forgot and skipped the sides, which is why they are pale in the photos) and sprinkle with sesame seeds. Bake for 30 minutes, until bronzed all over and buns have an internal temperature of 190 degrees F. Let cool slightly before serving.

To glaze (optional): If using glaze, whisk ingredients until smooth. You can drizzle this over the buns or serve it alongside with a spoon. If drizzling over, it’s best to let the buns almost fully cool before putting it on or it may melt off.


Sesame Cashew Bars

img_0763It seems I unexpectedly took a sabbatical from blogging…  Don’t worry, I’ve still been cooking/baking (although less than normal…)!  Life just got a bit hectic to fit photographing and blogging into the mix!

img_0732

The past 6 months have been a bit of a whirlwind with work, fellowship interviews all over the country, a month-long elective in NYC, new photography jobs, a quick trip to Iceland and everyday life.  I’ve managed to do some cooking and baking here and there…and obviously a lot of eating!

I’ve actually been meaning to post about these Sesame Cashew Bars from Sofra for a few months.  Have you ever purchased a cookbook just for one recipe?  These bars are that recipe!  It was love at first taste for me…salty, roasted cashews paired with smooth, silky caramel and buttery shortbread all together in one scrumptious bite.  I bought them one day while strolling through the Boston Public Market and meandering through the produce at Sienna Farms (run by the team behind Sofra and Oleana).  They called out to me inside their glistening cellophane packaging.  One bite was all it took and I was hooked.  I tried to save the rest of the bars by freezing them but it was a futile attempt.  Last summer I tried to recreate them by making these caramel cashew bars; they were very good but not as good as the Sofra version.

Lucky for me (and my friends), Sofra recently published a cookbook, Soframiz, featuring 100 recipes from Sofra…including these sesame cashew bars!!! I immediately bought the cookbook and made my first batch…and soon a second.   They were just as heavenly as I remembered!  They are relatively easy to make with only a handful of ingredients- just remember they need to be made the day before you are going to eat them so they can cool.

img_0737

Sesame Cashew Bars (From Soframiz)

Ingredients
For The Crust:
  • 2 cups plus 1 tablespoon all-purpose flour
  • 1¾ sticks (7 ounces) unsalted butter, chilled and cut into ¼-inch cubes
  • ⅔ cup firmly packed light brown sugar
  • ½ teaspoon kosher salt

For The Filling:

  • 3½ cups salted cashews, coarsely chopped
  • 2 tablespoons toasted sesame seeds
  • ¼ teaspoon kosher salt
  • 2 sticks (8 ounces) unsalted butter
  • ¼ cup granulated sugar
  • 1½ cups plus 2 tablespoons firmly packed light brown sugar
  • ½ cup raw honey
  • 5 tablespoons heavy cream
  • 1 teaspoon vanilla extract
img_0764
Instructions:
  1. Line a 13 by 9-inch pan with aluminum foil, making sure it extends over the sides (or else caramel seeps in between the foil and pan and makes it hard to get out…you might want to double layer). Very lightly spray or butter the foil. (see note below)
  2. Make The Crust: Combine the flour, butter, brown sugar, and salt in a food processor fitted with a metal blade. Pulse until the butter forms pieces the size of small pebbles, 20-30 seconds. Pour the crust crumbs into the prepared pan and press down to form an even layer. Cover and refrigerated for at least 30 minutes, or up to overnight.
  3. Preheat the oven to 350ºF. Bake the crust until golden, about 25 minutes. Set aside to cool.
  4. Make The Filling: While the crust is cooling, make the filling. Combine the cashews, sesame seeds, and salt in a large bowl. Mix well and set aside.
  5. Melt the butter in a large saucepan over low heat. Add the granulated sugar, brown sugar, and honey, and cook over medium heat, whisking constantly, until the sugar dissolves and begins to turn to caramel, forming large bubbles and thickening, or reaches 240ºF on a candy thermometer. Remove from the heat and whisk in the cream and vanilla. Add cashew mixture to the pot. Using a rubber spatula, fold the cashew mixture into the caramel until well combined.
  6. Pour the filling on top of the baked crust in an even layer. Return the pan to the oven and bake until the caramel bubbles along the sides of the pan only and the center is still liquid, 26 to 28 minutes. The filling will appear unbaked. It is very important not to over-bake. The filling will set up as it cools.
  7. Set aside to cool completely and then cover and refrigerate overnight.
  8. Lift the foil out of the pan to remove the bars in one large block. Cut into thirty-six 1½-inch squares.
  9. Store in an airtight container in the refrigerator for up to 2 weeks.  They taste best when allowed to come to room temperature for 30 min to an hour.
 img_0736img_0730

A Tale of Two (Baked) Donuts: Matcha Green Tea and Nutella

A few weeks ago I met up with my friend Linda who I befriended this summer at a wonderful food photography workshop here in Boston.  We have both been eagerly practicing our food styling and photographing since the workshop (i.e. we are major food dorks!) and decided to join forces to whip up, style, and photograph some beautiful baked donuts.  After perusing some recipes online, we decided to bake these matcha green tea donuts and baked nutella donuts.  Linda bought most of the ingredients (I brought the sprinkles!) and we convened at her lovely house on an overcast Sunday afternoon (perfect for photographing!).  She had just visited Mryth ceramics in Allston, MA so we had some gorgeous bowls and plates for styling.  I also brought along a few pieces from Ogusky Ceramics (@botonpotter) to round out the setup.

First up were the matcha green tea donuts.  We had a little extra help from Linda’s dog, Elsie, to make these 🙂 Who knew dogs loved green tea donut batter?

dsc_0145

I have to admit that we were a bit skeptical of the green tea donuts at first. They were a bit hard to get out of the pan and about half were deemed “unphoto worthy” after removal.

dsc_0159

After we ruined a few more donuts trialling different glaze dipping strategies, we finally found a method that was both delicious and aesthetically pleasing.  We recommend dipping the side that was not face down agains the pan while baking, otherwise the glaze sticks into all the nooks and crannies of the baked donut and doesn’t look great.

The final product was insanely delicious and quite pretty..if you like teenage mutant ninja turtle green 🙂

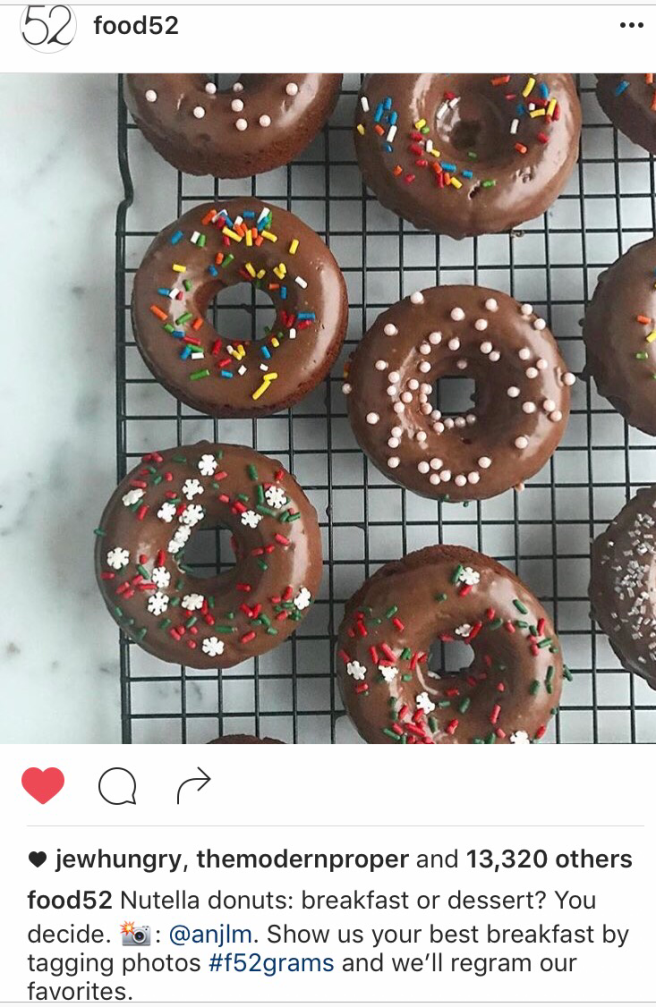
Next we moved on to the Nutella baked donuts.  We were in a bit of a rush to finish these because it was the first day after daylight saving time and we realized sunset was fast approaching!  These baked up perfectly round and were much easier to remove from the pan.  We went a little overboard decorating them with sprinkles and then ran upstairs to take advantage of the little remaining sunlight.  Luckily we were able to get a few shots in before it grew dark.

dsc_0190dsc_0195

While these donuts were the cuter of the pair, our favorite was the matcha green tea donuts.  Linda is already working on tweaking the matcha donut recipe!

dsc_0200

One other exciting thing that came from our donut making endeavor was that I got my first repost by Food52!!!!

img_0321

Find the donut recipes here:

Matcha Green Tea Donuts
Baked Nutella Donuts

Have any of you tried baked donuts?  What did you think? Any favorites?


Lemon Raspberry Mascarpone Tart

dsc_0026

It just started getting colder outside.  Fall is coming!  So I figured I should post this summer tart before it gets any colder!

I made this tart about 1 month ago for a dinner party.  I admit I wasn’t paying enough attention when I was making the crust (I blame too many hours at the hospital) and accidentally used 2 sticks of butter…instead of 6 Tbs!!!  I had a mini panic attack and then decided to just add another cup of flour and persevere on.  And I have to say, it was pretty delicious (and buttery!).  When life hands you lemons…turn it into a super buttery raspberry lemon mascarpone tart!

dsc_0029

For the Mascarpone Lemon Curd (from Joanne Chang in Fine Cooking)

1/2 cup fresh lemon juice
1-1/2 oz. (3 Tbs.) unsalted butter
3 large eggs
1 large egg yolk
1/2 cup granulated sugar
1/4 tsp. pure vanilla extract
1/8 tsp. kosher salt
8 oz mascarpone cream , softened

For the crust (adapted from Martha Stewart):
2 sticks (16 Tbs) unsalted butter, softened
1/4 cup sugar
2 1/2 cups flour
2 large egg yolks
1 1/2 teaspoons coarse salt

Assembly:
2 pints raspberries
Whipped cream (optional)

dsc_0022

For the mascarpone lemon curd:

In a 3-quart nonreactive saucepan, heat the lemon juice and butter over medium-high heat until just under a boil. In a medium heatproof bowl, whisk the eggs and egg yolk and then slowly whisk in the sugar until combined. Gradually whisk the hot lemon juice mixture into the sugar and eggs.

Return the mixture to the saucepan and set over medium heat. Cook, stirring constantly with a wooden spoon and scraping the bottom of the pan frequently, until the curd thickens and coats the spoon, 2 to 4 minutes. Draw your finger along the back of the spoon; when the curd is done, it should hold the trail.

Remove the curd from the heat and strain it through a fine sieve into a bowl. Whisk in the vanilla and salt. Cover with plastic wrap, pressing the plastic onto the surface of the curd, and chill for 1 to 2 hours before using. Mix 1 cup lemon curd with the mascarpone cheese until thoroughly blended.

For the crust:

Stir together butter and sugar in a medium bowl. Stir in yolks. Add flour and salt, and stir until mixture is dry and crumbly. Press dough into bottom and up sides of a 10-inch tart pan with a removable bottom. Freeze until firm, about 20 minutes. Meanwhile preheat oven to 375 degrees.

Bake, rotating halfway through, just until crust turns golden around the edges, 12 to 15 minutes. Let cool in tart pan on a wire rack, 1 hour.

Assembly:

Pour mascarpone lemon curd into chilled crust.  Top with fresh raspberries.  Serve with whipped cream if desired.

dsc_0014

dsc_0031


Lemon Ricotta Bars

img_4300

I went on a baking/food styling spree 4th of July weekend (see my mini blueberry pie post) and finally got around to making these lemon ricotta bars I had been eyeing from Food52.  If you don’t already follow them (via email, Facebook, instagram, etc.) I highly recommend you do!  They have tons of fantastic, but simple, recipes as well as beautiful photos and a wonderful selection of kitchen goods/accessories.

I love lemon bars and I love ricotta cheese so it only seemed natural to put them together.  The ricotta cheese gave the lemon bars a lighter and fluffier texture than normal lemon bars and made for a tangy yet refreshing summer treat.  I brought them into the hospital for my hardworking team and they ate them up pretty quickly!

img_4259

I’ve been practicing my food styling from my food photography class with Betty Liu and Cottage Farm so I got a little creative with the photo set ups for this recipe.  Some of the tips I employed for this shoot was styling using remnants of ingredients (like the juiced lemon rinds and egg shells) and using cheese cloth to add simple texture to the backdrop.  One of my favorite things about these photos is the oyster shaped ceramic plate made by Ae ceramics in Maine that I picked up the the Portland Trading Co. in Portland, Maine.  I am a little obsessed with this plate which may look familiar to you if you have ever dined at Eventide Oyster Co., also in Portland, Maine.  I am planning to add to my collection next time I am in Portland!

Lemon Ricotta Bars (from Food52)

  For the Crust

  • 1 3/4 cups unbleached all-purpose flour
  • 2/3 cup confectioners’ sugar
  • 1/4 cup cornstarch
  • 1 tablespoon lemon zest
  • 3/4 teaspoon salt
  • 12 tablespoons unsalted butter (1 1/2 sticks), cut into 1-inch pieces, slightly softened plus extra for greasing pan
For Lemon-Ricotta Filling

  • 8oz (1 cup) fresh whole milk Ricotta, drained
  • 4 large eggs, beaten
  • 1 1/3cups granulated sugar
  • 3 tablespoons unbleached all-purpose flour
  • 2 tablespoons lemon zest
  • 2/3 cup lemon juice from 3 to 4 large lemons, strained
  • 1/4 teaspoon salt

img_4276


  1. To make the crust: Adjust oven rack to middle position and heat oven to 350 degrees.
  2. Using a pastry brush, lightly butter a 13-by-9-inch baking dish and line with one sheet parchment paper. Butter paper, then lay second sheet crosswise over it.
  3. Pulse flour, confectioner’s sugar, cornstarch, lemon zest and salt in food processor.
  4. Add butter and process to blend; then pulse until mixture is pale yellow and resembles coarse meal.
  5. Sprinkle mixture into lined pan and, press firmly with fingers into even layer over entire pan bottom and about 1/2-inch up sides.
  6. Refrigerate for 30 minutes, and then bake until light golden brown, about 20 minutes.
  7. To make the filling: Whisk ricotta, eggs, sugar, and flour in medium bowl, then stir in lemon zest, juice, and salt to blend well.
  8. Reduce oven temperature to 325 degrees.
  9. Stir filling mixture before pouring into warm crust.
  10. Bake until filling feels firm when touched lightly, about 30 minutes.
  11. Transfer pan to wire rack; cool to room temperature, at least 2 hours.
  12. Transfer to cutting board, fold paper down, and cut into bars, wiping knife or pizza cutter clean between cuts.
  13. Dust with confectioner’s sugar.

img_4305

img_4301


img_4307

img_4306

Food Photography Workshop with Cottage Farm and Betty Liu

DSC_0066 2

Last month I FINALLY got to take a food photography workshop with my favorite food blogger, Betty Liu!!!!  She was a guest host with Krissy O’Shea from Cottage Farm for a one day workshop in Boston.  I was re-entering surgical residency the next day but decided to spring for one more day of fun before going back!  The workshop started with a private dinner at Loyal Nine the night before where we were served a special menu of savory pea pancakes, reminiscent of scallion pancakes, topped with grilled freshly harvested peas and, baked cheese with rhubarb and homemade crackers, delicious roasted chicken paired with balsamic glazed onion and fresh peas, and finally to end the night, strawberry rhubarb pie…all of course washed down by a refreshingly crisp French white wine.

The next morning we were off to an early start at Warehouse XI in Union Square.  Luckily we had some coffee from No Six Depot along with buttery croissants from Forge Bakery and fresh berries, yogurt, and homemade granola by Betty to get us caffeinated and started.  And of course we snagged a few photos of the breakfast set up :).

After breakfast, we quickly got to work learning camera and composition basics with a brief lecture from Betty and Krissy before starting to learn the basics of food styling.  We used natural light and they really pushed us to take advantage of different lighting scenarios like using darker lighting for some moodier shots while using bright spaces near the window for sunny breakfast shots.  The first scene we shot was mostly from a top down approach- actually setting up the scene on the ground! Genius for anyone who is short with back problems- sure beats balancing on a high chair to lean over and photograph!  Krissy set up the scene with breakfast remnants, demonstrating how to add in little touches (like crumbs) but at the same time not making it look overstyled.

Next we practiced some action shots from the side of Betty and Krissy pouring coffee (we maybe drank a little more too).

From coffee we moved on to my favorite…cheese!!!! We had sooooo much cheese donated by Vermont Creamery but I was tortured momentarily when I had to wait to dive in so we could practice some food styling!  Betty and Krissy set up a beautiful table spread of cheese, honey, bread, flowers, and little utensils.  Then we all took turns photographing the scene from the side and up top on a ladder…and then finally it was time to dig in!!!!!

Of course after cheese there was more eating with some delicious salads prepared by Krissy for lunch.  Check out the beautiful rye berry salad recipe by Krissy on her blog.

Following lunch we were all in a food coma but there was no time for rest…it was time to practice what we learned!  We broke off into groups to create our own food setups to photograph.  I think we did a great job (and had great teachers!)!

DSC_0042

DSC_0072

After all our hard work, it was time for some relaxation and cocktails made by Nic Korn, a local mixologist.  He made delicious aperol spritzes and cocktails with mint and gin.  I couldn’t resist snapping a few photos of the beautiful drinks!

DSC_0106

We finished with a brief tutorial on post-production editing in Lightroom and I picked up a few tips from Betty- including how to add my own filter which you see featured here!   Thank you to Krissy and Betty for an incredible and educational workshop!  I left the workshop with a new arsenal of photography, food styling, and editing skills and met some great people I home to stay in touch with!


Mini Cardamom Blueberry Pies

img_4318

Last week I re-entered surgical residency full time after a 2 year “research break”.  It was an abrupt transition going from ~40 hours a week, mostly at a desk, to over 80 hours at the hospital last week running around and operating.  By the end of the week I was exhausted!!!  But luckily I had the whole 4th of July weekend off to relax so I decided to recharge with a little baking and food photography.

Several weeks ago I took a one day food photography workshop with my food blog idol, Betty Liu, and Krissy O’Shea from Cottage Farm.  The workshop was amazing and I learned so many new tips and techniques for food styling-who knew crumbs were such a great styling prop?  Here are a few of my favorites from the workshop:

I was eager to test out my new food styling skills on my own so after a quick trip to Home Goods for some new props, I got down to work this weekend.  And what else to make for the 4th of July than pie???  Correction…mini pies??? (I think I have previously confessed my love for all foods that are miniature.)  I decided to go with blueberry pie and mixed it up a touch by adding cardamom and cinnamon…and then I got super patriotic by cutting out stars and stripes to decorate the pies.  The results were adorable and delicious!  Hope you all had a great 4th of July.  Feel free to comment below and tell me what you made!

img_4277

Mini Cardamom Blueberry Pies

Crust:
2 1/2 cups all-purpose flour
2 tablespoon sugar
3/4 teaspoon salt
1 cup (2 sticks) chilled unsalted butter, cut into 1/2-inch cubes
6 tablespoons (about) ice water

Cardamom Blueberry filling:

3 cups blueberries
1/4 cup sugar
1/4 tsp lemon zest
2 1/2 tablespoon water (divided)
10 cardamom pods
1 cinnamon stick
1 1/2 tablespoon corn starch

1 egg, beaten
Sugar for sprinkling

For the crust: Mix flour, sugar,  and salt in processor. Add butter; pulse until coarse meal forms. Gradually blend in enough ice water to form moist clumps. Gather dough into ball; divide in half. Form dough into 2 balls; flatten into disks. Wrap each in plastic; chill 2 hours or overnight.

For the filling: Add blueberries, sugar, lemon, 1 Tbs water, cardamom pods (make sure to count how many you add so you know how many to retrieve later!), and cinnamon stick to a medium saucepan. Alternatively, you can place cardamom and cinnamon stick in cheesecloth for easier retrieval. Heat over medium heat, stirring occasionally until mixture breaks down and starts to liquefy, about 7-10 minutes. Carefully remove and discard all 10 cardamom pods and cinnamon stick- you may want to use a utensil so you don’t burn yourself!.  Mix corn starch and remaining 1.5 Tbs water together and then add to the blueberry mixture. Cook until slightly thickened, about 1 minute. Remove from heat and cool completely (may be done in the refrigerator).

img_4286

Assembly: Preheat the oven to 375 degrees. Roll out one ball of dough to 1/4 inch thickness on a well floured surface. Use a 2.5-3 inch cookie cutter to cut out circles for the pie. You should have about 10 circles depending on the size of the cookie cutter. Place these, evenly spaced, on 2 baking sheets lined with parchment paper. Spoon some of the blueberry mixture into the center of the circle. Be careful not to place too much blueberry filling or the pies will overflow when the top is placed.

Brush the beaten egg around the edges. Roll out the second ball of dough and cut out the same number of pie circles. Cut a hole (or other shape!) in the middle and then make several slits in the pie circle to vent the pie while cooking. Place this circle of dough over the blueberry filling and use a fork to crimp the pie edges together. Brush the tops with the beaten egg. Sprinkle with sugar. Bake for 15-20 minutes until tops are golden brown. Remove from oven and cool on baking racks. Enjoy!

img_4315

img_4327

img_4330


Honey Lavender Ice Cream with Candied Hazelnuts

img_3943Earlier this month I made lavender shortbread cookies dipped in chocolate with sea salt, inspired by my trip to Croatia, where lavender permeated the streets.  This week I’m continuing on my Croatian culinary adventure by making ice cream with lavender, honey and candied hazelnuts, all from Croatia.

Side note: I also brought back some amazing white truffles which I used this week to flavor some homemade pasta with butter and parmesan cheese!!!!

img_4013

But back to the ice cream!  I previously made honey ice cream  a few years ago by substituting sugar for honey in my go-to Jeni’s Splendid Ice Cream recipe.  This recipe is a simple variation on the honey ice cream by infusing the milk and cream with lavender and then adding chopped candied hazelnuts.  However, you can change it up and add anything you want like chocolate chips- everything is better with chocolate!

img_3954

Honey Lavender Ice Cream with Candied Hazelnuts (adapted from Jeni’s Splendid Ice Creams)

2 cups whole milk
1 tablespoon plus 1 teaspoon cornstarch
3 oz of cream cheese, softened
1/4 teaspoon fine sea salt
1 1/4 cups heavy cream
2/3 cup  honey
2 Tbs dried lavender
1/2 cup chopped candied hazelnuts (confession: I cheated and used pre-made candied hazelnuts from Croatia)

Prep
Mix about 2 tablespoons of the milk with the cornstarch in a small bowl to make a smooth slurry. Whisk the cream cheese and salt in a medium bowl until smooth. Fill a large bowl with ice and water.

Cook
Combine the remaining milk, the cream, honey, and lavender in a 4-quart saucepan.  Bring to a rolling boil over medium-high heat, and boil for 4 minutes. Remove from the heat, and gradually whisk in the cornstarch slurry. Bring the mixture back to a boil over medium-high heat and cook, stirring with a rubber spatula, until slightly thickened, about 1 minute. Remove from the heat.

Chill
Gradually pour the hot milk mixture through a strainer/sieve into the cream cheese mixture, whisking until smooth. Pour the mixture into a 1-gallon Ziploc freezer bag and submerge the sealed bag in the ice bath. Let stand, adding more ice as necessary, until cold, about 30 minutes.

Freeze
Pour the ice cream base into the frozen canister and spin until thick and creamy. When almost done spinning, add the candied hazelnuts and spin until evenly distributed.  Pack the ice cream into a storage container. Freeze in the coldest part of your freezer until firm, at least 4 hours.

img_3945

img_3952

img_3951

Lavender Shortbread Cookies Dipped in Chocolate with Sea Salt- Inspiration from Croatia

img_3876

I just got back from one of the most amazing vacations in Croatia.  Nestled in Eastern Europe, this coastal country along the Adriatic Sea gets many of its influences from Italy and Greece.  The country is peppered with cute little coastal towns characterized by cobblestone alleyways,  restaurant patios reminiscent of a European city, gelato stands, and ancient Greek and Roman architecture all set on a backdrop of the glittering turquoise  Adriatic Sea bustling with boats.

One of the biggest surprises for me was the food!  Who knew Croatia was such a foodie mecca!  Fresh seafood is everywhere and cuttlefish or black squid ink risotto is one of their specialties- I think I ate this at least 4 times in my week-long trip.  Borrowing from their Italian neighbors, homemade gnocchi can be found in most restaurants.  Other specialties include white truffles from Northern Croatia, honey, capers, olive oil, wine, oysters, and lavender.

The lavender is grown in Hvar, a small party island a few hours by ferry from Dubrovnik or Split.  We were there just shy of lavender harvesting season (which occurs later in June) but were able to make a trip to see the lavender fields which are beautiful even not in bloom.  The lavender is sold all over Croatia in the form of potpourri, soap, honey, oil, and plain dried leaves for cooking.

img_3884

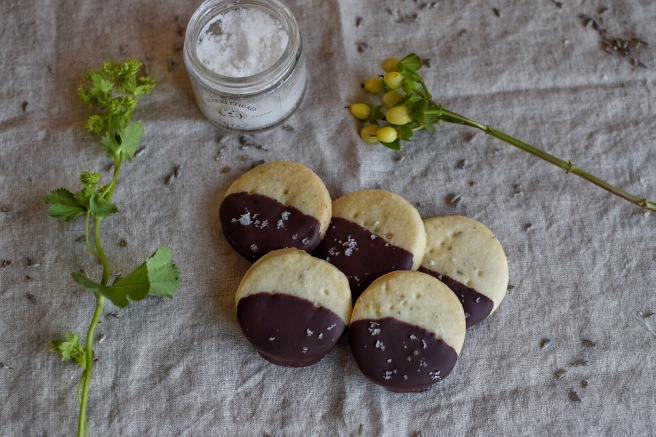
I, of course, returned home laden with food gifts: white truffles, truffle honey, truffle oil, candied hazelnuts, and lavender and lavender honey.  I’ll admit that lavender in food is a bit of an acquired taste, but I happen to love its subtle floral flavor in baked goods, especially paired with chocolate.  I have a few ideas for the lavender (honey lavender ice cream and a lavender lemonade cocktail) but first up was lavender shortbread cookies dipped in chocolate with sea salt.  This is actually a recipe I made about 10 years ago, before I even went to medical school.  I modified it slightly this time by sprinkling sea salt over the chocolate to add some contrasting flavor.

And don’t worry!  You don’t have to travel all the way to Croatia to find lavender (although maybe you should!), you can find it at many local grocery stores or buy it online.  Enjoy this recipe and look for future recipes on my blog featuring lavender!

Lavender Shortbread Cookies Dipped in Chocolate with Sea Salt

(makes about 4 dozen cookies)

1 1/2 cups (3/4 pound) butter, at room temperature (no substitutes)
2/3 cup sugar
2 tablespoons very finely chopped lavender florets (dried)
2 1/3 cups flour
1/2 cup cornstarch
1/4 teaspoon salt
10 oz bittersweet chocolate

sea salt for finishing

Preheat oven to 325°F.

Cover bottoms of two baking sheets with parchment or brown paper. In a large bowl, cream together the butter, sugar, and lavender with an electric mixer. Mix until light and fluffy, about 3 minutes. Add flour, cornstarch, and salt and beat until incorporated. Divide dough in half. Flatten into squares and wrap in plastic. Chill until firm.
img_3848
On a floured board, roll or pat out each square to a thickness of 1/2 inch. Cut the dough into 1 1/2 -inch squares or rounds. Transfer to baking sheets, spacing cookies about 1 inch apart. Prick each cookie several times with a fork.
img_3845
Bake 20 to 25 minutes until pale golden (do not brown). Cool slightly, then transfer to a rack.
Melt chocolate in microwave, starting with 30 seconds and adding time in 15-20 second increments after, stirring in between so it doesn’t burn.  Dip half of each cookie into the melted chocolate and place on a cookie sheet lined with parchment paper.
Sprinkle sea salt on the chocolate before it sets.  Refrigerate for 15 minutes.  Enjoy!
img_3798
img_3875
img_3873

Green Tea Matcha Cupcakes with Whipped Mascarpone Frosting


frosting51-loop

This post is really exciting for me! First off, it’s been a long time since I baked anything for my blog…life and work seem to always get in the way. Second, I got to test out my new macro lens!  I’ve been wanting to buy one for a long time but finally decided to bite the bullet after I got hired to shoot some food photography for 2 local restaurants!!!  While I love my 35 mm prime lens and it has been great so far for my food photography, macro lenses can reproduce even more detail which is perfect for drool-worthy food photographs!

DSC_0647

Lastly, you may notice the new videos/GIFs I’ve used in this post.  They are actually called “stop-motion vignettes” and are perfect for showing cooking and baking processes like frosting a cupcake!  I learned how to make them from the amazingly talented photographer and food blogger, Betty Liu.  Check out her blog to learn how to make your own stop-motion vignettes.  It took some trial and error, but I think I got the hang of it eventually.

output_f2VHs5

So now for the cupcakes…I first experimented with matcha green tea last year in  my post on matcha green tea, white chocolate macademia nut cookies.   Matcha green tea is a fine green powder that has been popping up everywhere from lattes to cookies and cakes.  Not only does it have a lovely flavor, but it makes for a gorgeous green color.  I had initially planned on making a different dessert this weekend but figured cupcakes would be the perfect dessert to show off my new stop motion vignettes!  I was also tasked with making a non-chocolate dessert for dinner with friends tonight so matcha seemed like the perfect flavor to try.  I paired the matcha cupcake with a simple, light frosting so as to not overpower the delicate matcha flavor in the cupcake.  The result was pretty tasty- hopefully my friends will agree!

DSC_0634-2

Matcha Green Tea Cupcakes with Whipped Mascarpone Frosting

(makes 12)

Matcha Green Tea Cupcakes (adapted from Martha Stewart)

1 cup cake flour
1/4 teaspoon salt
1/4 teaspoon baking soda
1/2 teaspoon baking powder
2 tabelspoons matcha green tea
1/2 stick (4 tablespoons) unsalted butter, room temperature
3/4 cup sugar
1 large egg
1/2 cup sour cream, room temperature

Whipped Mascarpone Frosting

1 stick (8 tablespoons) unsalted butter, room temperature
4 oz cream cheese, room temperature
8 oz mascarpone cheese, room temperature
2 cups powdered sugar
1/2 tsp vanilla extract
pinch of salt
1/4 cup heavy cream

Preheat oven to 350 degrees. Line a standard 12-cup muffin tin with paper liners. In a small bowl, sift together flour, salt, baking soda, baking powder, and matcha.

In an electric mixer fitted with paddle attachment, cream together butter and sugar on medium-high speed until light and fluffy, 3 to 5 minutes. Add egg and mix on medium until combined, scraping down sides of bowl as needed. Reduce speed to low. Add flour mixture and then sour cream, mixing until just combined.

Divide batter evenly among lined cups, filling each about halfway. Bake, rotating halfway through, until cupcakes spring back to touch and a cake tester inserted in centers comes out clean, about 16 minutes. Let cool in tin 5 minutes, then transfer cupcakes to a wire rack to cool completely.

DSC_0598

For the frosting, combine the butter, cream cheese, and mascarpone cheese in a stand mixer, fitted with a whip attachment.  Beat on medium to high speed until thoroughly combined, about 1-2 minutes.  Add the powdered sugar, vanilla extract and salt and mix until smooth.  Add the heavy cream and whip on high for a minute until light and fluffy.  You may want to refrigerate for 30 minutes before frosting to firm it up a bit.

Frost the cooled cupcakes and enjoy!

DSC_0642

DSC_0668

DSC_0637

DSC_0629

Cooking Vegetarian with Alden and Harlow and Formaggio Kitchen

Almost 2 years ago I wrote a blog post trying to recreate the “ubiquitous kale salad” from one of my favorite Boston restaurants, Alden and Harlow.  While my version was pretty good, it still paled in comparison to Alden and Harlow’s creation.  Luckily, I finally got my chance to learn how to make it this past week at a sold-out vegetarian cooking class with Michael Scelfo of Alden and Harlow hosted by Formaggio Kitchen.

Normally vegetarian cooking doesn’t get me super excited.  However, Michael Scelfo takes forgotten or common vegetables (like kale, broccoli, or carrots) and turns them into star dishes, bursting with texture and flavor.  Trust me, you won’t miss the meat in any of these!

Scelfo started the class by talking about Alden and Harlow and his original concept for the restaurant.  At the time, he was trying to eat healthier and cook with more vegetables at home with his wife and three children.  He focused on making simple dishes with good ingredients and new flavor profiles.  He then took this concept of home cooking and elevated and refined it for Alden and Harlow.  If you follow his instagram feed (@mscelfo) you’ll see all the mouth-watering, restaurant-worthy dishes he cooks at home for his lucky family (#dinnerathome).

DSC_0523

His restaurant has been wildly successful and he’ll be opening his second restaurant, Waypoint, in a few months.  One of my favorite things about Alden and Harlow is how often Scelfo rotates the menu, creating new dishes based on what is available and seasonal locally.  However, there are a few old-standbys that have been on the menu since the early days and they just happen to be vegetarian!

DSC_0396

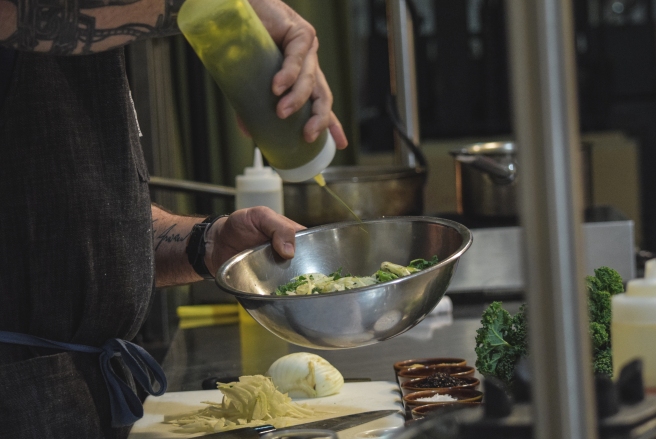
The first dish of the night was the highly anticipated “ubiquitous kale salad”.   First raw kale is mixed with raw, thinly sliced fennel.  The salad is then elevated by adding a rich, creamy dressing of creme fraiche, pistachios, lemon and honey and then topping it with crispy fried kale (everything is better fried, right?).  The outcome was as delicious as I remembered and I can’t wait to make it at home!


The next dish he taught us is a complete surprise to the palate: Pickled corn pancakes with buttermilk, maple, shishito, and popcorn.  This dish was based on corn pancakes his family made growing up but  elevated and punched up a few notches.

DSC_0497DSC_0513

This creation is the epitome of sweet and savory; the sweet corn pancake and maple is balanced out perfectly by the whimsical popcorn topping and shishito peppers.  He makes a sweeter version with fruit for brunch.

DSC_0538

The final dish he demonstrated was charred broccoli with butternut squash hummus, bianco sardo and smoked cashews.  The hummus is made with roasted butternut squash and smoked cashews as a base.  While it may be hard to smoke cashews at home (due to strict Boston area fire rules) the rest of the butternut squash hummus is relatively straightforward and versatile.  Scelfo encouraged us to experiment and change up the dishes depending on availability of ingredients or taste preference.

DSC_0558

By the end of the class I was surprisingly full from all the delicious vegetables…and maybe slightly tipsy from the plentiful Montenidoli Tradizionale wine (thanks Formaggio Kitchen!).  Scelfo really proved that vegetarian cooking can be both flavorful, innovative, and easy to do at home.  Kale salad anyone????:)


Nutella Blossom Cookies

As a Jew, Christmas has always seemed magical to me: the tree, the lights, the presents, and of course…the cookies!  With the explosion of social media posts around the holidays, it seemed like everyone was getting in the Christmas spirit (minus Mother Nature…70 degrees on Christmas Eve? Seriously?).  While I didn’t go all in and buy my own Christmas tree (I’ll admit I was kinda tempted because they smell so good!) I did decide to make my own Christmas, or holiday, cookies.

Last weekend I attended an awesome ugly sweater holiday party and the hostess made the most delicious cookies: Nutella cookies!  I am pretty sure I have confessed my love for Nutella before but I really really really really love Nutella!!!!!!!!!!!!!!!!!!!!!!!!!!  After obtaining the recipe from the hostess I decided to make my own version of traditional Peanut Butter Blossoms (the peanut butter cookies with a hershey kiss in the middle) but with the Nutella cookies.

One key fact I learned while making these cookies: While Nutella is amazing, skinning hazelnuts is not.  You can buy them already skinned if you are lucky enough to locate them but I, unfortunately, was not that lucky.  There are 2 methods to skinning hazelnuts.  Both have their pluses and minuses and both are kinda a pain.  I chose the blanching method with good results and to be honest, these cookies are worth the pain.

To all my loyal readers, happy and delicious holidays!

Nutella Blossom Cookies (Recipe adapted slightly from Cook’s Country via food.com)

Makes about 54 cookies

3 cups  all-purpose flour
2 teaspoons  baking powder
1⁄2teaspoon  salt
1 1⁄4cups nutella, spread
4 tablespoons  unsalted butter, softened
1 1⁄3cups  granulated sugar
1 teaspoon  vanilla extract
1 teaspoon  instant espresso powder
2 large  eggs
1⁄3 cup  milk
1⁄2 cup  hazelnuts, skinned, toasted and chopped fine
1 cup  confectioners’ sugar
54 hershey kisses

Adjust oven racks to upper middle and lower middle positions and preheat oven to 375°F.

Line 2 baking sheets with parchment paper. Combine flour, baking powder, and salt in a bowl. Set aside.

With electric mixer on medium high speed, beat Nutella, butter and granulated sugar until light and fluffy, about 2 minutes. Add vanilla, espresso powder and eggs and mix until incorporated. Reduce speed to low, add flour mixture and milk, and mix until just combined. Fold in 1/2 cup of hazelnuts and refrigerate dough until firm about 1 hour.

Place confectioners’ sugar in a bowl. One at a time roll dough into 1 inch balls and then roll in confectioners’ sugar.

Place balls 2 inches apart on prepared baking sheets.  Press one hershey kiss into the center of each cookie.

Bake until set, about 8 minutes, switching and rotating sheets halfway through baking. Cool 5 minutes on sheets, and transfer to wire rack and cool completely.

Chocolate Pumpkin Pie

Last weekend I spent the weekend visiting my friend in Philly and eating lots of delicious food (and shopping…).  Philly has an amazing food and cocktail scene and I probably arrived home about 5 pounds heavier!  While everything was delicious, my favorite meal was at Vernick Food and Drink near Rittenhouse Square.  The meal started with the perfect amuse-bouche: a tiny cup of the most delicious sweet potato soup I have ever tasted.  I would have been satisfied just eating an entire bowl of it for my dinner!  But then I never would have tried the toast with fromage blanc, the striped jack and avocado crudo, the parmesan custard, the black-pepper glazed octopus, the tagliatelle with duck ragout and last but not least, the amazing chocolate pumpkin pie dessert!

Their chocolate pumpkin pie was a rich, creamy dark chocolate pie with strong pumpkin spice flavors.  Served warm as a small  individual pie (enough for 2 or 3…or 1 🙂 ) it was the perfect end to an outstanding meal.  As soon as I had my first bite of the pie, I knew I had to try to recreate it at home.

I had recently seen a recipe in the November issue of Bon Appetit for a Pumpkin Caramel Tart and decided to modify it to try to recreate the Vernick Chocolate Pumpkin Pie.  Instead of making the caramel as the recipe calls for, I made a dark chocolate ganache and substituted this for the caramel in the recipe.  I altered the spices and then poured the filling into a simple butter pie crust, laced with more spices.

The final product was pretty good but definitely paled in comparison to the Vernick version.  The chocolate overpowered the pumpkin quite a bit so I’m planning on increasing the amount of spices I use in my next test run (or maybe adding ground cloves or all-spice).  I was also unhappy with the crust and plan to substitute for a graham cracker or gingersnap crust next time.  Any volunteers to taste test?

Chocolate Pumpkin Pie

Crust (makes 2 9 inch pie crusts, adapted from Bon Appetit):
2 1/2 cups all purpose flour
1 tablespoon sugar
3/4 teaspoon salt
1 tsp cinnamon
1/4 tsp nutmeg
1/4 tsp ginger
1 cup (2 sticks) chilled unsalted butter, cut into 1/2-inch cubes
6 tablespoons (about) ice water

Filling (adapted from Bon Appetit Pumpkin Caramel Tart):
1 cup heavy cream
1 cup dark chocolate chips (or chopped dark chocolate, no greater than 70%- I like using Ghiraddelli dark chocolate chips)
1 cup canned pumpkin purée
tablespoons light brown sugar
1/4 cup granulated sugar
1 tablespoon all-purpose flour
1 tsp cinnamon
1/4 tsp nutmeg
1/4 tsp ginger
¾ teaspoon kosher salt
3 large eggs

whipped cream for serving

For the crust: Mix flour, sugar, salt, and spices in processor. Add butter; pulse until coarse meal forms. Gradually blend in enough ice water to form moist clumps. Gather dough into ball; divide in half. Form dough into 2 balls; flatten into disks. Wrap each in plastic; chill 2 hours or overnight.

Preheat over to 350 degrees.  Roll crust out on a floured surface into a 12-14 inch circle.  Fit into a 9 inch pie pan and crimp the edges.  Line crust with parchment paper and fill with pie weights, dried beans or rice.  Bake for 15 minutes.  Remove parchment paper and pie weights and bake for 5 more minutes until set.  Allow to cool.

For the filling:  Scald the cream over medium heat in a small saucepan until bubbles just start to form.  Pour over the dark chocolate in a medium heat resistant bowl.  Allow to stand for about a minute and then whisk chocolate and cream together until smooth to make a ganache.

Mix pumpkin puree, brown sugar, granulated sugar, flour, spices and salt together in a large mixing bowl.  Slowly mix in the chocolate ganache.  Add the eggs one at a time, mixing completely in between each addition until smooth.

Pour filling into prepared pie shell.  Bake at 350 degrees for 40-45 minutes until edges are set and center barely jiggles.  Cool on a wire rack.  Serve cold or at room temperature.  Top with whipped cream if desired.

Store in refrigerator.

Pumpkin Cheesecake Snickerdoodle Cookies

Last Wednesday (November 4th) was National Stress Awareness Day (it was also National Candy Day…).  In a world filled with picture perfect Facebook, (insert social media of choice here), and Instagram posts, it’s easy to think that everyone else is living a fun, happy, stress-free life.  But the truth is, most of us deal with some amount of stress on a daily basis…some have just gotten better at hiding it.

National Stress Awareness Day comes at a perfect time.  Not only is it starting to get colder, but Daylight Savings kicks into effect robbing us of an extra hour of light everyday.  Cold and darkness can certainly exacerbate feelings of stress and depression.  Additionally, by November, I generally find that I have overcommitted to too many work projects and social engagements and need some time to myself.

Everyone has their own way to deal with this stress and for me, that comes in the form of cooking and baking (I recognize, though, that this may be stress inducing for others).  So last Wednesday, instead of going to spinning class, going out on a date, or working on a research project, I decided to just go home and cook, bake, and relax!

I had a craving for a pumpkin dessert and after logging onto Pinterest, these pumpkin cheesecake snickerdoodle cookies immediately caught my eye!  It is kinda hard to resist pumpkin and cheesecake all combined into one amazing cookie!

I will admit that these were a little more labor intensive than I initially anticipated.  The dough was a little sticky which made it a bit difficult to work with when assembling the cookies.  Perhaps I should have chilled the dough longer but patience is not my virtue…especially when pumpkin is involved!  The extra work was worth it though- the soft, pillowy, pumpkin spiced cookies did not last long at work the next day!  These cookies may not cure your stress, but they will certainly make it a little sweeter 🙂

Pumpkin Cheesecake Snickerdoodle Cookies

(Makes 24, from The Recipe Critic)

Cookies:
3¾ cups all-purpose flour
1½ tsp. baking powder
½ tsp. salt
½ tsp. ground cinnamon
¼ tsp. freshly-ground ground nutmeg
1 cup unsalted butter, at room temperature
1 cup granulated sugar
½ cup light brown sugar
¾ cup pumpkin puree
1 large egg
2 tsp. vanilla extract

Filling Ingredients:
8 ounces cream cheese, softened
¼ cup sugar
2 teaspoons vanilla extract

Cinnamon-sugar coating:
½ cup granulated sugar
1 tsp. ground cinnamon
½ tsp. ground ginger
Dash of allspice

In a medium bowl, whisk the flour, baking powder, salt, cinnamon, and nutmeg together. Set aside.

In a stand-mixer with a paddle attachment, beat together the butter and sugars on medium high speed until fluffy about 2-3 minutes.  Blend in pumpkin puree, beat in egg and then add vanilla. Slowly add dry ingredients on low speed just until combined. Cover and chill dough for an hour.

To make the cream cheese filling, blend cream cheese, sugar and vanilla together. Chill for an hour.

Preheat oven to 350 and line your baking sheets with parchment paper. In a small bowl, combine the sugar and spices for the coating and set aside.

To make the cookies, take a tablespoon of the cookie batter. Flatten it like a pancake and place a teaspoon of the cream cheese in center. Form another tablespoon of the cookie batter into a flat pancake shape and place on top of the cream cheese. Pinch the edges together sealing in the cream cheese and roll into a ball. Roll in the cinnamon sugar coating and place on the prepared baking sheet 2 inches apart.

Repeat until the dough is gone and flatten the cookie dough balls with a heavy bottomed glass or measuring cup.  Bake the cookies for 10-15 minutes or until the tops start to crack. Let cool on the baking sheet for 5 minutes and transfer to a wire rack. Enjoy!

Apple Pie Bars

Insert obligatory ode to fall post proclaiming love for all things pumpkin, pumpkin spice latte, pumpkin beer, butternut squash, flannel, boots, sweaters, fall foliage, cider, apples, apple picking, etc etc etc here:

……………………………………………………………………………….
……………………………………………………………………………….
……………………………………………………………………………….

……………………………………………………………………………….
……………………………………………………………………………….

And then make these!

Apple Pie Bars

(from Food and Wine Magazine)

For the crust:
1 1/2 sticks unsalted butter, softened
3/8 cup sugar
1 1/2 cups all-purpose flour
1/4 teaspoon kosher salt

For the apple filling:
3 tablespoons unsalted butter
1/4 cup light brown sugar
6 semi-tart apples (about 3 pounds, I used Honeycrisp, Macoun, and Cortland, you can also use Granny Smith)—peeled, cored and thinly sliced
1/2 tablespoon cinnamon
1/8 teaspoon freshly grated nutmeg
1/2 cup water, as necessary

For the crumb topping:
3/8 cup walnuts
1 1/2 cups quick-cooking oats
1 cup all-purpose flour
3/4 cup light brown sugar
1/2 teaspoon cinnamon
1/4 teaspoon baking soda
1/4 teaspoon kosher salt
1 1/2 sticks unsalted butter, cut into 1/2-inch cubes and chilled

For the crust: Preheat the oven to 375°. Line a 9×13 baking dish with parchment paper. In a standing electric mixer fitted with the paddle, beat the butter with the sugar at medium speed until light and fluffy, 2 minutes. At low speed, beat in the flour and salt until a soft dough forms. Press the dough over the bottom of the pan. Bake in the center of the oven for 20 minutes, until the crust is golden. Let cool on a rack. 

For the apple filling: In a large skillet, melt the butter with the light brown sugar. Add the apples to the skillets and cook over high heat, stirring occasionally, until softened, about 10 minutes. Stir the cinnamon and nutmeg into the skillet. Cook until the apples are caramelized and very tender and the liquid is evaporated, about 10 minutes longer; scrape up any bits stuck to the bottom of the skillet and add up to 1/2 cup of water to  prevent scorching. Let cool. 

For the crumb topping: Toast the walnuts in a skillet or in the oven until lightly toasted. Let cool, then coarsely chop the walnuts. In a large bowl, mix the oats with the flour, light brown sugar, cinnamon, baking soda and salt. Using a pastry blender or two knives, cut in the butter until the mixture resembles coarse meal. Stir in the walnuts and press the mixture into clumps. (You can also cheat and pulse all ingredients in a food processor before mixing in the chopped walnuts.)

Assembly: Spread the apple filling over the crust. Scatter the crumbs on top, pressing them lightly into an even layer. Bake in the center of the oven for about 50 minutes to an 1 hour, until the topping is golden; rotate the pan halfway through baking. Let cool completely on a rack before cutting into 2-inch bars

The bars can be stored in an airtight container at room temperature for 4 days or frozen for up to a month.

Serve warmed or at room temperature.  They are especially tasty when served warmed with a scoop of vanilla ice cream and a drizzle of salty caramel.

Cocktails and Cheese with Alden and Harlow and Formaggio Kitchen

Normally when people think of pairing cheese with alcohol, they immediately think of wine and cheese.  However, apparently we’ve been doing it wrong this whole time!  The tannins, in wine, especially red wine, dull the palate, according to Food52, and make many wines a less than ideal choice to pair with cheese.

So what should you pair with cheese?  Follow Formaggio Kitchen’s lead and pair with beer, cider….and COCKTAILS! (Check out their full listing of classes here)  The idea of pairing cheese with cocktails may scare you at first, but trust me, it is genius!  Especially when the cocktails are made by Seth Freidus, bar manager at Alden and Harlow (one of my favorite restaurants currently in the Boston area).

Seth started out bartending in high school, mostly because it looked cool and fun.  He continued to bartend in college, eventually landing a job at Eastern Standard after he graduated.  He learned a lot on the job and supplemented this by reading books about cocktails.  He’s now gained national recognition as the bar manager at Alden and Harlow and likes to focus on housemade vermouths and rotating cocktails utilizing seasonal ingredients (think turnips, eggplant, or beets!)

To create this class, Seth met up with Julia Hallman, general manager of Formaggio Kitchen, to plan the pairings.  While the selection of cheese often drives the pairings, this time Julia and Seth mixed things up a bit (no pun intended) and chose the cocktails first- I can imagine this was a fun planning session!

The final cheese plate is shown below:

Class started with a classic cocktail- the Green Fly- created in the early 20th century.  A stirred cocktail, it consists of gin, lemon juice, chartreuse (an herbal liquor), demerara syrup (similar to a simple syrup but using demerara sugar) and finished with a touch of orange oil from an orange peel .  This was paired with Ruggles Hill Ada’s Honor, a goat’s milk cheese from Hardwick, MA.  This farm is run by Tricia who milks all 14 goats by hand!  The cheese has a lovely bright, clean, and herbal flavor that was balanced out beautifully by the citrus based cocktail.

Next we moved on to shaken cocktails with a variation of a negorini.  This cocktail contained gin, cardamaro (a vegetal amaro), and a sweet vermouth (Dolin Rouge). This cocktail was described as “vegetal” and “nutty” and was paired with a Corsu Vecchiu, a sheep’s milk cheese from Corsica, France.  This region is known for its cheese-making traditions that never change and result in the same salty, bright, rich cheese every time.

This was followed by another stirred cocktail using Oloroso sherry, Applejack brandy, demerara syrup, lemon juice and a touch of salt.  The nutty, rich flavors of this cocktail lend itself well to “ripe” and “stinky” cheeses such as Rippleton, a sheep’s milk cheese from Casanovia, New York.  This cheese is a bright orange color on the outside from the wash-rind process, while the inside oozes with soft, delicious, pale yellow cheese.  I happen to love this kind of cheese but was a little skeptical about pairing it with a cocktail- but it totally worked!  This was one of my favorite pairings of the night.

Next, we went back to shaken cocktails with a mezcal based drink.  Mezcal is a delicious smokey agave liquor (similar to tequila) and it was shaken with dry vermouth, Manzanilla sherry, demerara syrup and finished with lemon oil from a lemon peel.  The smokey, sweetness of this cocktail was balanced perfectly by the savory, salty, richness of the Tomme Crayuese cow’s milk cheese it was paired with.  Tomme Crayuese…cleverly called “Tom Cruise” by the staff at Formaggio…is from Savoie, France and is produced via an aging process resulting in a layered cheese with a harder rind and soft, creamy interior.

By this point, we were starting to feel a bit tipsy with the generous pours but in the name of cheese and cocktails we persevered on!  Next we tried another sherry based cocktail with Oloroso sherry, Applejack brandy, Montenegro (one of my favorite amaros) finished with orange oil.  This was the perfect pairing for the rich, caramely Olimankaas cow’s milk cheese studded with bits of crunchy, salty lactose crystals.

Last but not least was another mezcal cocktail.  This one was shaken with Cocchi Americano, Oloroso sherry, green chartreuse and finished with orange oil.  The resultant cocktail was paired with a goat’s milk blue cheese- Persil Rambouillet from Ile-de-France.  The mild saltiness of the blue cheese lent itself well to the smokey notes in the cocktail.

I have to say, after this class, I am a definite believer in pairing cheese with cocktails.  I was surprised at how well every cocktail balanced out the cheese and fully enjoyed every single pairing!  And as if the night couldn’t get any better, we headed out to Alden and Harlow for a late night feast after class!

If you haven’t taken any classes at Formaggio Kitchen, make sure to check out their class listing here.

Full disclosure:  I am “paid” by Formaggio Kitchen in cheese and alcohol to photograph classes 🙂

Salted Cashew Caramel Bars

I’m going to make this post short and sweet (and maybe a little salty?).

Once again I’ve been inspired to bake by the Boston Public Market.  While picking up some produce at Siena Farms the other week, I couldn’t help but be lured by their sesame cashew bites made by Sofra, a Middle Eastern cafe and bakery established by Ana Sortun.  These little treats were layered with shortbread, caramel, sesame seeds and salted cashews and were every bit as addicting as they sound! Luckily they freeze well if you want to try to keep yourself from eating the entire package in one sitting!

While still dreaming/drooling over these delectable squares, I was asked to bring a dessert to a work potluck.  After a quick google search for “caramel cashew squares” I found a recipe on serious eats that fit the bill.  Even better, they could be made ahead of time and refrigerated which was perfect for my busy schedule.

While they weren’t quite as good as the Sofra version, I left home with an empty tupperware container…always a good sign!  I have a feeling there might be a request for them at next year’s potluck!

Salted Cashew Caramel Bars (from serious eats)

For Base:

2 cups (about 10 ounces) all-purpose flour
1/2 teaspoon baking powder
1/2 teaspoon kosher salt
3/4 cup unsalted butter, at room temperature
1 cup (about 7 ounces) sugar
1 large egg
3/4 teaspoon vanilla extract

For Topping:

1 1/2 cups (about 10 1/2 ounces) sugar
1 cup heavy cream
6 tablespoons unsalted butter, roughly cut into pieces
1 teaspoon vanilla
1/2 teaspoon salt
2 cups salted roasted cashews

Adjust oven rack to middle position and preheat oven to 375°F. Line a 13- by-9 inch baking pan with foil. Grease foil with butter. In a small bowl, combine flour, baking powder, and salt; set aside

In the bowl of a stand mixer fitted with a paddle attachment, beat together butter and sugar until fluffy and light in color, about 4-5 minutes. Beat in egg, then vanilla. Beat in the flour mixture in two additions, scraping down the sides of the bowl each time.

Place dough in prepared pan. Using either floured hands or a piece of plastic wrap, press dough evenly into the bottom of the greased baking pan. Let chill in refrigerator for 20 minutes.

Bake crust until golden brown, about 30 minutes. Remove crust, but keep oven on. Let crust cool completely. While crust is cooling, make filling.

Place sugar in a nonstick saucepan over medium high heat. Let stand until bottom layer of sugar begins to melt, then start stirring, continuing to stir until sugar has turned light brown in color and smooth in texture. Pour in heavy cream, being careful of it splattering. Stir constantly until mixture is smooth again, about 5 minutes. Turn down heat and stir in butter, vanilla, and salt. Take mixture off heat and stir in cashews. Pour mixture into pan. Bake for 15 minutes.

Let mixture cool for at least two hours or until set. When firm to the touch, cut into bars. Bars can be kept in the refrigerator for easier cutting.

Heirloom Tomato, Pesto, and Goat Cheese Tart

My birthday was a few weeks ago and for it, the city of Boston gave me the best present ever: the opening the the Boston Public Market!  For those unfamiliar, the Boston Public Market is a year-round, indoor market consisting of 37 local vendors offering coffee, donuts, cheese, meat, flowers, prepared foods, smoked fish, local produce and more.  It is the most local market in the US…just a 1/2 mile walk from my apartment!

I have probably been at least 5 times since it opened and some of the vendors are starting to recognize me (Hi Boston Smoked Fish Company!).  However, given my recent hectic work and travel schedule, I haven’t been able to cook or bake to take advantage of the amazing fresh produce offered.  This Saturday I finally had a free day in Boston and decided to let the market guide me through a lazy afternoon in the kitchen.

The gorgeous display of bright heirloom tomatoes at Siena Farms immediately caught my eye (along with fresh corn and peaches).  I quickly remembered the leftover homemade pesto in my freezer and after stopping at Appleton Farms for some fresh goat cheese, my dinner quickly materialized!

I have long had a love affair with rustic tarts- both for their simplicity and deliciousness- and decided to try my hand at my first savory tart.  I used my favorite pie/tart crust minus the sugar and then spread a layer of homemade pesto on the bottom.  Next, I layered several different varieties and colors of sliced heirloom tomatoes, sprinkled with olive oil and sea salt to bring out their flavor.  Finally, I topped the tart with the fresh goat cheese before baking it in the oven.

This was the perfect savory, summer tart to take advantage of the Boston Public Market.  Steamed sweet corn, peach crisp (a la mode), and a refreshing glass of rosé rounded out the meal!  I can’t wait to have leftovers in my call room today! (No rosé of course…)

Heirloom Tomato, Pesto, and Goat Cheese Tart

2 1/2 cups flour
1 1/4 tsp salt
16 oz (2 stick) cold butter, cut into 8 pieces
4-5 Tbs ice cold water
several tablespoons Pesto (homemade or store-bought), enough to cover bottom of tart
4-5 medium-large heirloom tomatoes, cored and slices
olive oil, to taste
sea salt, to taste
4-6 oz goat cheese
1 egg
splash of water

Make the pastry dough by blending the flour, salt and butter in a food processor and pulsing until it resembles peas. Add 1 Tbs of water at a time while pulsing until the mixture forms into a dough.  Turn out into a disk on plastic wrap and refrigerate for at least 30 minutes.

Preheat over to 425 degrees F.  Lightly flour a large surface and roll out tart dough into a large circle until it is about 1/4 inch thin.  Transfer dough to parchment lined baking sheet (rimmed is preferable in case tart leaks).  Spoon pesto over dough, leaving a 3 inch rim of dough.  Layer the tomatoes in concentric circles.  Drizzle lightly with olive oil and sprinkle with sea salt to taste.  Top with pieces of goat cheese.

Fold dough over the edges, using the parchment paper to help, and pinch the corners together to seal it.  Make an egg wash my beating the egg with a splash of water.  Brush over the exposed edges of the dough.

Bake at 425 degrees F for 30-40 minutes, until crust is browned and tomatoes start to bubble.  Remove from oven and let cool for at least an hour.  Serve at room temperature with more pesto if desired.

Independence Day Oatmeal Cream Pies: White Chocolate, Blueberry, Oatmeal Cookies with Raspberry Filling

Happy belated 4th of July!  I’m going to make this post short and sweet as I try to get back into the work week after a great 4th of July weekend!

The great thing about having this blog is that it forces me to be creative.  My default for the 4th of July is usually a pie (and I made one of those too this year…just couldn’t help myself).  Pies are usually pretty quick and easy to make, and with so much great fuit in season in July, they are the perfect BBQ dessert!

However, I hadn’t blogged in a while (sorry) so I decided to dig into my creative side and create a new 4th of July themed cookie.  Insprired by red, white and blue, I created my own version of an Oatmeal Cream Pie (my favorite dessert snack as a kid).  I hate raisins in anything (except for Joanne Chang’s carrot cake) so those were out.  Instead I replaced them with dried blueberries and white chocolate chips.  To make these taste lighter and more summery, I replaced the nutmeg and cinnamon called for in the original recipe with lemon zest.  Finally, I made a raspberry frosting for the filling (first seen on the blog here) to complete the traditional 4th of July red, white, and blue theme!  While my triple berry crostata was the first dessert to go, the cookies were a success…a few even dug in before the pork and burgers!

White Chocolate, Blueberry, Oatmeal Cream Pies with Raspberry Filling

1 cup (2 sticks) unsalted butter, at room temperature
2/3 cup granulated sugar
1 cup packed light brown sugar
2 large eggs, at room temperature
1 3/4 cup flour
1 teaspoon baking soda
1 teaspoon sea salt
lemon zest from 1/2 a lemon
1 3/4 cup old –fashioned rolled oats (not instant or quick-cooking)
1 cup dried blueberries
3/4 cup white chocolate chips

In the bowl of a stand mixer, beat the butter and sugars until very light and fluffy, about 5 minutes. Meanwhile in a separate bowl, whisk together the flour, baking soda, salt, and lemon zest, making sure there are no lumps of baking soda. Stir in the oats, dried blueberries and white chocolate chips.

Add the eggs, one at a time, and beat until thoroughly combined. On low speed, or by hand, gradually add the flour and oat mixture to the creamed butter, mixing until completely incorporated.

Chill the batter a few hours or overnight, covered. (This step is optional, although recommended)

To bake the cookies, preheat the oven to 350ºF (180ºC). Line a baking sheet with parchment paper or a silicone baking mat.  Scoop out 1 Tbs balls of cookie dough and bake until just browning, about 9-10 minutes.  Let cool completely on wire racks.

Raspberry Filling

12 oz raspberries (fresh or frozen)
1 cup (2 sticks) of butter at room temperature
4 1/2 cups of powdered sugar, divided

Heat raspberries in a small saucepan over medium heat, stirring occasionally, until berries are broken down. Pour into a blender and puree until smooth. Strain raspberry puree through a fine mesh strainer to remove the seeds. Return puree to the saucepan and simmer over low heat until reduced slightly so you end up with about 1/2 cup of raspberry puree (about 3-5 minutes). Let sit at room temperature for about an hour and then chill in refrigerator 1-2 hours until cool and thick. Can be made 1-2 days ahead of time.

In a stand-mixer with a whip attachment, whip the butter and 2 cups of powdered sugar until combined. Add the raspberry mixture (1/2 cup) and mix to combine. Gradually add the remaining 2 1/2 cups of powdered sugar, scraping the bottom and sides of the bowl as needed to thoroughly incorporate all ingredients. Continue to whip for 1-2 minutes until frosting is lighter in color.

Assembly

Once cookies are completely cooled, pipe (or spread, but piping looks prettier!) a generous teaspoon of raspberry frosting onto the bottom side cookie. Place another cookie on top and gently press down until frosting reaches the edges of the cookie.  Enjoy! (Warning: you will have extra frosting!)

Beer and Cheese Class with Night Shift Brewing and Formaggio Kitchen

Two weeks ago was the first night of my new job: event photographer for Formaggio Kitchen (I’m working on my back up plan in case this whole surgery thing doesn’t work out).  I still consider myself a very amateur photographer so I was more than happy to get paid in beer and cheese (obviously the best form of payment)!

While many in the area are familiar with Formaggio Kitchen (and their fantastic array of cheeses, charcuterie, and other specialty food items), some of you may not know that they offer an amazing selection of classes at their learning annex, often partnering with other local producers and chefs.

Last week they paired up with Night Shift Brewing to demystify beer and cheese pairings. Night Shift Brewing started off as a trio of friends brewing beer in a 5 gallon pot with a homebrew kit and has now grown to a popular craft microbrewery and tap room in Everett, MA.  Their beers can be found in many bars in the greater Boston area (or visit their tap room!).

While cheese is more commonly paired with wine, I found out last night that it pairs beautifully with carefully selected beers as well!  Full disclosure:  I’m not a huge beer drinker.  I tend to gravitate more towards wine and cocktails but I thoroughly enjoyed all of Night Shift’s offerings last night, especially paired with delicious cheese.

The night started out with a sampling of one of their signature beers, Whirlpool, a pale ale with grapefruit and peach flavors, perfect for a hot summer’s night…or really anytime!

After a brief introduction, we then moved on to the beer and cheese pairings, led by Asa Waters of Night Shift Brewing, and Tripp Nichols from Formaggio Kitchen.

The first paired beer was a very  generous pour of the Belafonte Saison, a classic saison brewed with pink peppercorns and orange peel.  Another great refreshing beer for summer…I have a feeling I might be drinking more beer during the summer after this class!

The saison was paired with two different cheeses:

  • Comté Fort Saint Antoine- a hard cow’s milk cheese from Jura, France, similar to a Swiss Gruyere, with a dark nutty flavor
  • Chèvre du Haut Bearn- an aged goat’s milk cheese from Pyrenees, France, with bright, tart, and salty flavors

The spicy notes of the beer from the pink peppercorn really worked well to balance out both cheeses.  My favorite pairing was the chèvre, but the crowd favorite, by a long-shot, was the Comté.  What can I say? I’m a sucker for salty cheeses!

Next we transitioned to a sour beer, the Diagonal.  This is a more experimental beer fermented with lactobacillus as well as chamomile lemon verbena.  This gives it an herbal back bone to complement the tart and sour notes.

The Diagonal was paired with two local cheeses:

  • Lea’s Great Meadow- a goat’s milk cheese from Ruggles Hill Creamery in Hardwick, MA, a soft creamy cheese with an herbaceous undertone
  • Verano- a hard sheep’s milk cheese from Vermont Shepherd in Putney, VT, with a tanginess and saltiness that paired very nicely with the tart Diagonal

I absolutely loved the floral/herbal goat cheese but, unfortunately, my friend’s husband stole the rest of my piece!  Luckily I was able to drown my sorrows in more beer (and cheese)!

From sour and tangy we moved on to a darker, sweeter beer, the Trifecta Belgian Ale, my personal favorite of the night.  This is brewed with three Trappist yeasts with the addition of vanilla beans (what a wonderful idea!).  The result is a wonderful smooth, fruity and crisp beer.

The two cheese pairings were:

  • Tunworth- a super gooey, strong, creamy, wash-rind cow’s milk cheese from Herrland Hampshire, UK,(my favorite of the night)
  • Ouleout- a soft cow’s milk cheese from Vulto Creamery in Hamden, VT  with a touch of funk

Everyone loved the creamy Tunworth and I couldn’t stop eating it the rest of the night!

The final beer of the night was the 87, their double IPA.  Brewed with “tons” of American hops, this beer is a little more textural and sweeter than the previous beers.  A touch of bitterness pairs it well with salty, strong blue cheese.

  • Bayley Hazen Blue- a cow’s milk blue cheese from the Cellars at Jasper Hill in Greensboro, VT, very similar to a Stilton but cheaper and made locally!
  • Colston Bassett Stilton- cow’s milk from Neal’s Yard Dairy, UK, the “king of cheese”, a classic blue cheese with rich flavors, high in salt

Overall, it was a fantastic night full of good beer and cheese (and a Taylor Swift after hours dance party) led by the enthusiastic and knowledgeable staff from Night Shift Brewing and Formaggio Kitchen.  If you missed this event, Formaggio Kitchen has several more beer and cheese classes this summer featuring several different local breweries.  And don’t forget to check out the tap room at Night Shift Brewing!

Mini Blueberry Thyme Crostatas

Alas, the cold weather is finally gone and we seem to have fast forwarded through spring and into summer with the blink of an eye.  While I really shouldn’t complain about the heat after our awful winter…it is really hot!!! Especially when you have no air conditioning because your building is fixing your pipes through June (insert sad violin melody here).

So to welcome “summer”, and full embrace the heat, I decided to warm up my steamy apartment a little more by baking! (Clearly I have my priorities straight.)  Blueberries are one of my favorite summer fruits (along with raspberries, strawberries, peaches, cherries watermelon…) and they were on sale at my local Whole Foods (Paycheck) so I decided to adapt one of my favorite crostata recipes.

The original recipe is for an apple crostata but last summer I substituted apples for peaches with a beautiful result.  This time I decided to go mini (yes, I have an obsession with mini desserts) with blueberries as the star, minus the buttery streusel.  Could it be that I’m trying to bake a little healthier? Or maybe I just got lazy…  I love using herbs and citrus in baking so I added some lemon zest to the crust and some fresh thyme to the blueberries.

They are delicious on their own, or if you want to increase your daily calcium and vitamin D intake, you can top with a whipped mascarpone cream (equal parts whipping cream and mascarpone, whipped until thick and creamy and flavored with a touch of powdered sugar and vanilla).

Final note to self: Making pie dough in 80+ weather with no AC is a little difficult and requires much refrigeration in between steps.  Best to avoid, if possible, until AC situation remedied!  Try ice cream instead 🙂

Mini Blueberry Thyme Crostatas

(makes about 5 crostatas)

Crust: (Adapted from Kosher by Design cookbook)

2 1/2 cups all-purpose flour
1 1/4 tsp salt
2 Tbs sugar
zest of 1 lemon
2 sticks (1 cup, 16 Tbs) unsalted butter, cold, cut into about 8 pieces
4-5 Tbs ice water

Blueberry Thyme Filling:

2 1/2 cups fresh blueberries
1/4 cup sugar
juice of 1 lemon
1 Tbs flour
1 Tbs cornstarch
dash of cinnamon
1/2 tsp fresh thyme leaves

Egg wash:

1 egg mixed with 1 Tbs water

For the crust:

In a food processor, pulse flour, salt, sugar and lemon zest 2-3 times until mixed.  Add the chilled butter.  Pulse until mixture resembles peas.  Add the ice water 1 Tbs at a time until the dough just comes together.

Turn dough out onto a piece of plastic wrap or parchment paper.  Knead briefly to bring together in a ball and flatten slightly into a disc.   Chill  for 30 minutes in the refrigerator.

For the blueberries:

Mix all of the above ingredients together.  Allow to sit for about 10 minutes.

Assembly:

Preheat the oven to 375.  Line a rimmed baking sheet with parchment paper.

Remove the dough from the refrigerator and set on a lightly floured surface.  Roll the dough out until it reaches 1/4 inch thickness.  Cut into 6 inch rounds, I used a bowl as my guide.  After cutting the first 2-3 rounds, you’ll need to re-roll the scraps to cut more.  If dough becomes too soft and difficult to roll, refrigerate again for about 10 minutes.  You should get 5 small circles.

Spoon blueberry filling into the center, leaving at least a 1 inch border.  Be careful not to overfill, you will likely have leftover filling.

Fold the edges over the filling, covering about an inch of filling all around.  Make sure to seal any seams so it stays folded while baking.  Brush the crust with the egg wash.  Bake for 30-40 minutes until crust is golden brown and blueberries are bubbling.  (If crust browns too quickly, you can cover crust with tinfoil with center cut out.)  Remove from oven and cool for at least one hour.  Enjoy!

Charoset Ice Cream with Manischewitz Raspberry Sauce

There has been a lot of hype this year (or as much hype as anything passover inspired can garner) over the new Charoset ice cream by Ben & Jerry’s. Consisting of a vanilla base with a swirl of apples and nuts, this new ice cream debuted just in time for Passover.

But don’t forget, I had this idea first!!!

Last year, when brainstorming ideas for Passover ice cream, my first thought was to make a charoset inspired ice cream with a Manischewitz base. Unfortunately, my friends vetoed this idea but we ended up with a super delicious chocolate covered matzo ice cream instead.  However, I vowed to make it this year…although with a slightly improved and re-worked concept. And make it I did! (along with 2 chocolate cakes, chocolate covered matzo ice cream and coconut macaroons)

I decided to forego the Manischewitz ice cream base (the main source of concern from my friends) in favor of a cinnamon ice cream.  I then mixed in candied walnuts and cooked apples and topped it with a Manischewitz raspberry sauce.  While the chocolate covered matzo ice cream was still the favorite, everyone seemed to like the charoset ice cream (and the Manischewitz sauce!).  This might be the start of a new passover tradition!  Or I could always try to make a maror ice cream next year. 🙂

Disclosure:  This ice cream contains corn syrup and corn starch and therefore does not adhere to strict Ashkenazi Passover rules.

Charoset Ice Cream: Cinnamon ice cream with apples and candied walnuts

Candied Walnuts
(adapted from Bon Appetit)

1 cup walnuts (about 3 1/2 ounces)
2 tablespoons light corn syrup
1 tablespoon sugar
1/2 teaspoon salt

Preheat oven to 325°F. Spray baking sheet with nonstick spray. Combine walnuts and all remaining ingredients in medium bowl; toss to coat. Spread nut mixture on prepared baking sheet (some nuts may clump together). Bake until nuts are deep golden and sugar mixture is bubbling, stirring occasionally to break up clumps, about 15 minutes. Cool completely on baking sheet. (Can be made 3 days ahead. Store in airtight container.)
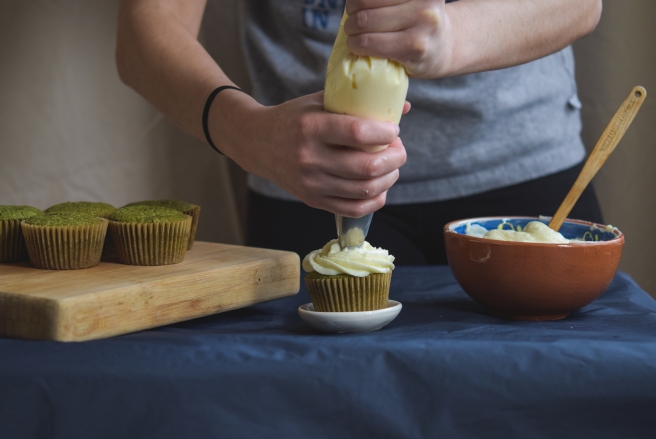
Apples:

1 1/2 apples of your choosing, chopped into small cubes
1 Tbs butter
2 Tbs sugar
dash of ground cinnamon

Heat the butter in a small sauce pan over medium heat.  Once melted, add the apples, sugar and cinnamon and toss to coat.  Cook until softened, about 5 minutes, and then set aside.

Cinnamon Ice cream:
(adapted from Jeni’s Splendid Ice Cream)

2 cups whole milk
1 tablespoon plus 1 teaspoon cornstarch
3 oz of cream cheese, softened
1/4 teaspoon fine sea salt
1 1/4 cups heavy cream
2/3 cup sugar
1/4 cup light corn syrup
2 cinnamon sticks
1/2 tsp ground cinnamon
1 tsp vanilla extract

Prep
Mix about 2 tablespoons of the milk with the cornstarch in a small bowl to make a smooth slurry. Whisk the cream cheese and salt in a medium bowl until smooth. Fill a large bowl with ice and water.

Cook
Combine the remaining milk, the cream, sugar,  corn syrup, and cinnamon sticks in a 4-quart saucepan, bring to a rolling boil over medium-high heat, and boil for 4 minutes. Remove from the heat, and gradually whisk in the cornstarch slurry. Bring the mixture back to a boil over medium-high heat and cook, stirring with a rubber spatula, until slightly thickened, about 1 minute. Remove from the heat.

Chill
Gradually strain the hot milk mixture into the cream cheese mixture and whisk until smooth. Whisk in the ground cinnamon and vanilla extract.  Pour the mixture into a 1-gallon Ziploc freezer bag and submerge the sealed bag in the ice bath. Let stand, adding more ice as necessary, until cold, about 30 minutes.

Freeze
Pour the ice cream base into the frozen canister and spin until thick and creamy.  Add the end, add in the apples and candied walnuts.

Pack the ice cream into a storage container. Press a sheet of parchment directly against the surface, and seal with an airtight lid. Freeze in the coldest part of your freezer until firm, at least 4 hours.

Serve with Manischewitz sauce below.

Manischewitz Raspberry Sauce

1 1/2 Cups Manischewitz wine
10 oz frozen raspberries, defrosted
1/4 cup sugar

Bring the Manishcewitz wine to a boil and simmer until reduced to about 1 cup, about 5 minutes.  Add the raspberries and sugar and simmer for an additional 5 minutes.  Allow to cool and then carefully transfer to a blender and blend until liquified.  Strain sauce and then cool.  Can be made 2 days ahead of time.  Spoon over ice cream for the complete charoset experience.

Matcha Green Tea White Chocolate Macadamia Nut Cookies


Last week my friend and I ventured out to try a new(ish) ramen restaurant for lunch.  After stuffing our bellies to the brim full of rich chicken broth, noodles and pork to the point that we couldn’t eat any more ramen, we decided we really wanted some warm, gooey white chocolate macadamia nut cookies.  Yes, there is a separate dessert stomach…I’m a doctor, I know these things.  Unfortunately (or perhaps for our waistlines, fortunately), we couldn’t find any cookies up to our standards (although we didn’t look too hard because by then, the food coma had already set in), so I decided to take matters into my own hands…but with a twist.

I’ve been seeing dessert recipes utilizing matcha green tea recently, such as these cookies from Bon Appetit and this vertical roll cake, and have wanted to experiment with some of my own creations. Matcha is a shockingly bright green powder made from ground green tea leaves.  It reportedly boosts energy with anti-oxidants and caffeine and has been popping up in coffee and tea houses around the country.  You can read more about it here.

Since this was my first recipe experimenting with matcha, I decided to start simple and these cookies were the perfect opportunity.  The recipe is very straight forward; it’s as easy as adding 2 Tbs of matcha powder to the flour and then making the cookies per usual.  It’s pure coincidence that these green beauties are just in time for St. Patty’s Day!

Matcha Green Tea White Chocolate Macadamia Nut Cookies
(recipe modified from Flour)

1 cup unsalted butter, at room temperature
3/4 cup granulated sugar
3/4 cup light brown sugar
2 eggs
1 tsp vanilla
1 1/4 cup all-purpose flour
1 cup bread flour
2 Tbs match green tea powder
1 tsp baking soda
1/2 tsp salt
11 oz white chocolate chips
1 cup salted and roasted macadamia nuts, chopped

If you’re baking the cookies on the same day you prepare the batter, heat the oven to 350 degrees and position a rack in the center of the oven.

Using a stand mixer fitted with a paddle attachment (or mixing by hand with a wooden spoon), beat the butter, granulated sugar, and brown sugar on medium speed until mixture is light and fluffy, about five minutes. Stop the mixer and use a rubber spatula to scrape down the sides and bottom of the bowl and the paddle itself a few times; the sugar and butter love to collect here and stay unmixed. Beat in the eggs and vanilla extract on medium speed until thoroughly combined, two to three minutes. Again scrape the bowl and the paddle to make sure the eggs are thoroughly incorporated.

Mix together the all-purpose flour, bread flour, matcha powder, baking soda and salt. Turn the mixer to low speed (or continue to use a wooden spoon if mixing by hand) and slowly blend the flour mixture into the butter-sugar mixture until just mixed.  Add the white chocolate chips and macadamia nuts and mix until incorporated.

For best results, scrape dough into a container and let rest in the refrigerator for a day before baking. The next day, heat the oven to 350 degrees and position a rack in the center of the oven. Scoop the dough into 1 Tbs balls onto a baking sheet with parchment paper about two inches apart. Press dough balls down slightly with the palm of your hand. Bake until cookies are just starting to brown at the edges about 8-10 minutes. They will still be very soft in the center. Remove from oven and let cool. The cookies can be stored in an airtight container for up to three days. The unbaked dough can be stored for up to a week in an airtight container in the fridge.


Lemon Ricotta Muffins

People often ask me how I got into cooking and I don’t really have a great answer.  There was no lightening moment for me.  It just happened gradually over time, starting around college, each year getting more and more into the world of the culinary arts.  Along the way there have been a lot of influences, starting with watching a lot of Food Network: Bobby Flay, Alton Brown (if you haven’t been to his live road show GO!!!), Ina Garten, and Giada De Laurentis.

I have since “outgrown” most of the Food Network shows (and have less time to watch them), but I still turn to my old favorites for some classic tried-and-true recipes.  This lemon ricotta muffin recipe by Giada is one of them!  It is basically foolproof.  Delicious, lemony, soft muffins with just the right amount of sweetness. Perfect for breakfast, brunch, or an afternoon snack!

Lemon Ricotta Muffins (Biscuits) from Giada De Laurentis

2 cups all-purpose flour
1/2 teaspoon baking powder
1/2 teaspoon baking soda
1/2 teaspoon salt
1 cup plus 1 teaspoon sugar or more as needed for sprinkling
1/2 cup (1 stick) unsalted butter, room temperature
1 tablespoon finely grated lemon zest (from 2 lemons)
1 cup whole-milk ricotta cheese
1 large egg
1 tablespoon fresh lemon juice
1/2 teaspoon almond extract

Line 12 muffin cups with paper liners. Preheat the oven to 350 degrees F.

Whisk the flour, baking powder, baking soda, and salt in a medium bowl to blend. Using an electric mixer, beat 1 cup sugar, butter, and lemon zest in a large bowl until light and fluffy. Beat in the ricotta. Beat in the egg, lemon juice, and almond extract. Add the dry ingredients and stir just until blended (the batter will be thick and fluffy).

Divide the batter among the prepared muffin cups. Sprinkle the remaining 1 teaspoon of sugar over the muffins. Bake until the muffins just become pale golden on top, about 20 minutes. Cool slightly. Serve warm or at room temperature.

S’mores Cupcakes

Super Bowl Sunday is obviously a huge holiday in my life…who can resist chips and guacamole (or as we called it “gronkamole”), buffalo wings and tenders, cornbread, chili, and cupcakes? Oh and apparently it also involves some sort of sports game involving men tackling each other in tights with deflated balls…and Katy Perry.

But I digress…Sunday night my friends and I gathered together for the 3rd year in a row to make an awesome Super Bowl feast and to watch a pretty exciting Patriots’ win!  In addition to the cornbread, I was in charge of the dessert (per usual).  I  had been wanting to test out an idea I had for s’mores cupcakes and this was the perfect opportunity.  Especially since I could top the cupcakes with toasted and…DEFLATED marshmallows and make fun of the “deflategate” controversy.

Most recipes I’ve seen use a chocolate cupcake as a base for s’mores cupcakes.  However, I decided to go with a brown sugar and cinnamon cupcake to simulate a cinnamon graham cracker.  I then filled them with a marshmallow filling (made from Fluff!!!) and topped it with my favorite chocolate ganache frosting recipe from Flour Bakery.  And of course, the final touch is a marshmallow on top that is toasted (broiled/torched) just before serving.

They were the perfect treat to enjoy while watching the Patriots win their 4th Super Bowl victory!

S’mores Cupcakes

Brown Sugar Cinnamon Cupcakes (Adapted from 52kitchenadeventures.com)
Yields 12 cupcakes

1 1/2 cups flour
1 teaspoon baking powder
1/4 teaspoon sea salt
1 teaspoon cinnamon
1 stick of unsalted butter, at room temperature
1 cup plus 2 tablespoons packed light brown sugar
2 large eggs, at room temperature
1 teaspoon vanilla 1/2 cup plus 2 tablespoons buttermilk

Marshmallow Filling (from Sweet Pea’s Kitchen)

6 tablespoons unsalted butter, softened
1 ½ cups confectioners’ sugar
¾ cup Marshmallow Fluff
1 ½ tablespoon heavy cream

Chocolate Ganache Frosting (from Flour Bakery)

12 oz semisweet chocolate, chopped (or can use semisweet chocolate chips- recommend Ghiradelli brand)
1 cup heavy cream 1 cup (2 sticks) unsalted butter at room temperature
1 cup confectioners’ sugar
1/4 tsp Kosher salt
1/2 tsp vanilla extract

12 large marshmallows

For the cupcakes:

Preheat oven to 325 °F. Line muffin tin with paper or foil liners. In a medium bowl, combine flour, baking powder, cinnamon and salt. In a large bowl, cream butter and brown sugar until pale and fluffy. Add eggs one at a time, beating after each until fully incorporated. Mix in vanilla extract. Add flour mixture to wet ingredients in 3 batches, alternating with 1/2 of the buttermilk, stirring after each until everything is combined. Pour batter into prepared muffin tin. Bake for around 25 minutes or until a toothpick inserted in the center comes out clean.

For the filling: Cream together all ingredients in a stand mixer fitted with a whip attachment until homogenous.  Transfer to a pastry bag.

Cut out a small circle in the center of each cupcake.  You may reserve these to put back in place after filling the cupcakes.

Pipe marshmallow frosting into each hollowed out center.   Cover, if desired, with reserved cupcake cut-outs (you’ll probably want to trim them).

For the frosting:

In a small saucepan, scald the cream over medium-high heat. Pour the hot cream over the chocolate and let it sitfor about 1 minute, then slowly whisk together until completely melted and smooth. Let sit at room temperature for 1-2 hours until completely cool ( or refrigerate for about 30 min whisking every 10 minutes)

Fit a stand mixer with the paddle attachement (or can use a handheld mixer) and beat butter on medium-low speed for 10-15 seconds, until smooth. Add the confectioners’ sugar, salt, and vanilla and continue to beat on medium-low speed for about 2 minutes until mixture if fluffy and smooth. On medium speed, add the cooled ganache and beat until completely combined, about 2 minutes. Stop to scrape bottom and sides of bowl. Turn up mixer speed to medium-high and beat for about 1 minute until frosting lightens in color and thickens.

Frost each cupcake, preferably piping from a pastry bag.

To toast the marshmallows, preheat your broiler.  Toast marshmallows until browned on top and melting- should take less than 1 minute, DO NOT leave unattended.

Alternatively, you can toast over a gas burner or with a creme brûlée torch.

Let marshmallows cool for about 5 minutes.  Then transfer to tops of cupcakes- warning: marshmallows will be sticky and a little difficult to transfer!


Chocolate Babka

Those who know me know I need little excuse to bake…but blizzards and snow days are as good as any!  With growing concern in Boston over reports of record snow fall and winds, I headed to my local Whole Foods (along with everyone else in a 5 mile radius) to stock up…on butter, flour, sugar, and eggs!

I decided to take advantage of this forced hibernation by baking things I’d had on my “to do” list for a long time.  First up was the chocolate babka I’d seen on Food52.com (Does anyone else think of that Seinfeld episode whenever they hear “chocolate babka”?).

Chocolate babka is a slighty sweet yeast bread swirled with a spiced chocolate nut mixture.  I made this recipe almost exactly as written except I substituted toasted pecans for almonds.  It was the perfect breakfast to wake up to while snowed in!  And I have a feeling it will be even better tomorrow as french toast!  Next up for today….Alton Brown’s macaroni and cheese followed by Milk Bar’s cornflake, marshmallow, and chocolate chip cookies.

Chocolate Babka (from Food52)

Dough

2 1/4 tsp or 1 packet active dry yeast
3/4 cup milk at 110ºF
6 tbs unsalted butter at room temperature
6 tbs sugar
2 tbs vegetable oil
1 tsp vanilla extract
egg yolks
3 1/3 cups all purpose flour
1 tspsal

Stir the yeast into the milk to dissolve. Let sit until foamy.

While the yeast proofs cream the butter and sugar together in the bowl of a stand mixer. Add the oil and vanilla extract and mix well to combine. Then add the egg yolks one at a time, mixing until each yolk is incorporated before adding the next. Increase the mixer speed to high and beat the mixture for about 2 minutes.

Turn the mixer to low and add the flour and salt, followed by the milk and yeast mixture. Switch to the dough hook attachment and mix the dough until a soft, tacky dough forms. Transfer the dough to a floured surface and knead by hand for two more minutes. The dough should feel soft, supple and smooth. Move the dough to a clean, oiled bowl and cover with plastic wrap. Let the dough rise at a moderate room temperature for about 2 hours or until almost doubled in size. Alternately, you can let the dough rise overnight in the refrigerator and shape it the next day.

Filling and Streusel

Filling

3/4 cup finely chopped bittersweet or semisweet chocolate
cup sliced almonds (or pecans), toasted and finely chopped
1 tsp ground cinnamon
1/4 cup cold unsalted butter

Streusel

2 tbs soft unsalted butter
1/4 cup all purpose flour
1/4 cup brown sugar
pinch salt
egg for egg wash

Prepare the filling while the dough is rising. Put all of the ingredient into a large bowl and use a pastry blender or bench scraper to cut the ingredients together into a streusel-like crumble.

To shape the bread: Roll the risen dough on a lightly floured surface into a roughly 15×18 inch rectangle. Gently lift the dough to make sure that it will easily release from the work surface. Sprinkle the filling mixture evenly over the top of the dough leaving a 1/4-inch border around the edges then roll the dough from the long end into a tight log about 20 inches long. Gently bend the dough into a U-Shape and twist the arms of the dough two or three times around each other to form the loaf, then pinch the seams together. Place the dough into a greased 9-inch by 5-inch loaf pan. Cover with plastic wrap and let rise at room until the babka fills the pan, 1-2 hours.

Preheat oven to 350ºF.

Prepare the streusel: Combine all of the streusel ingredients in a bowl and mix until crumbly. When the loaf has risen completely, brush with egg wash made from 1 egg + 1T water and sprinkle the streusel mixture over the top. Use a toothpick to poke a few holes in the top of the loaf which will release any air pockets trapped between the folds of the dough and filling.

Put the loaf pan on a baking sheet and bake for 20-25 minutes, then rotate the pan and bake for 20-30 more minutes. The loaf will be deep golden brown on top and sound hollow when the bottom is tapped when finished. You can also use a thermometer to check the internal temperature which will be 185º when the loaf is finished. Let the babka cool to room temperature before slicing.

Black Bottom Banana Cream Pie

I grew up in a pretty traditional American family eating traditional American foods. We had spaghetti night, taco night, chicken, hot dogs and hamburgers, occasionally homemade pizza, chocolate chip cookies, etc, etc.  But one thing we almost never had in the house was bananas!

My mom hates them (and will probably hate this post!).  I swear she has some sort of banana 6th sense- if there is a banana within a 5 mile radius she can smell it and will make it her mission to destroy it!  So needless to say, I was often deprived of this healthy, delicious, potassium rich fruit as a child (along with cable TV).

Luckily, now that I live on my own (and beyond the 5 mile banana radius) I can eat all the bananas I want- and what better way to eat bananas than in a pie with pudding and crust and whipped cream!

The idea for this pie was actually born this summer and is a combination of several different recipes.  Banana cream pies generally have a flaky, butter crust but I decided to swap it out for a chocolate coated graham cracker crust.  It is then filled with sliced bananas and homemade vanilla pudding before being topped with whipped cream and more chocolate (you really can never have enough chocolate).

The key element that really brings this all together is the 1/2 tsp of salt in the whipped cream.  Don’t leave it out!  I promise that it is a game changer. (You should generally add some salt to all desserts to bring out the sweetness.)

Enjoy (and sorry Mom!).

Black Bottom Banana Cream Pie

Vanilla Pudding (adapted from Bon Appetit):

4 large eggs
cup sugar
¼ cup cornstarch
4 cups whole milk
2 Tbs unsalted butter
2 tsp vanilla extract
Pinch of kosher salt

Crust (adapted from Bon Appetit):

Nonstick vegetable oil spray
7 whole graham crackers, coarsely broken
1/4 cup (1/2 stick) unsalted butter, melted
2 Tbs sugar
1 1/3 cups bittersweet chocolate chips (about 8 ounces)
2/3 cup chilled whipping cream
2 Tbs light corn syrup

3 ripe bananas, sliced thinly

Whipped cream topping:

1 1/3 cup chilled whipping cream
3 Tbs confectioners’ sugar
1 tsp vanilla extract
1/2 tsp kosher salt

To make the pudding:  Lightly whisk eggs in a large bowl just to blend. Whisk sugar and cornstarch in a medium saucepan. Gradually whisk milk into sugar mixture and heat over medium heat, whisking often, until very warm to the touch. Gradually whisk half of hot milk mixture into eggs, then whisk egg mixture back into milk mixture in saucepan.

Cook, whisking constantly, until thickened and whisk leaves a trail in pudding (it should be the consistency of mayonnaise), about 4 minutes. Remove from heat, add butter, vanilla, and salt and whisk until butter is melted and mixture is smooth.

Strain pudding through a fine-mesh sieve into another large bowl. Cover pudding with plastic wrap, pressing directly onto the surface. Chill until cool, about 2 hours.

For the crust:  While the pudding chills, preheat the oven to 350 degrees. Spray 9-inch-diameter glass pie dish with nonstick spray. Blend graham crackers, melted butter, and 2 tablespoons sugar in processor until moist clumps form. Press crumb mixture over bottom and up sides of prepared pie dish. Bake crust until lightly browned, about 15 minutes.

Meanwhile, combine chocolate chips, 2/3 cup cream, corn syrup, and 1 teaspoon vanilla in microwave-safe bowl. Microwave on medium heat until chocolate softens, about 3 minutes. Whisk until melted and smooth. Spread about 2/3 of chocolate mixture over bottom of crust. Freeze 10 minutes.  Reserve the rest of the chocolate to drizzle on top of the finished pie.

To assembly the pie: Spread a thin layer of the chilled pudding over the chocolate.  Arrange the banana slices over the pudding in about 2 layers and then top with the remaining pudding until the pie dish is filled (you may have some extra left over).  Chill for at least 4 hours.

It’s best to top pie with whipped cream just prior to serving.  To make whipped cream, combine all ingredients in a stand mixer fit with a whip attachment and beat on high until stiff peaks form.  Spread on top of pie.  Drizzle with remaining chocolate (you may need to rewarm in microwave for about 20 seconds).

Roasted Cauliflower Soup with Truffle Oil

Cauliflower is the new kale! You heard it here first!  Actually, it’s been proclaimed the new kale for about a year now but it’s still really really really good.  My favorite preparation is to simply roast it with olive oil, salt and pepper to bring out the delicious nutty, caramel flavors (and then maybe add some pomegranate seeds, parsley, hazelnuts…).  However, given that winter has finally decided to grace us with its below freezing temperatures and gale force winds, I decided to take the roasted cauliflower one step further by turning it into a soup.

This humble soup of roasted cauliflower, onion, garlic, water and milk is delicious served as is.  But, finishing with sautéed mushrooms and truffle oil really elevates the dish and lends an earthy flavor and aroma.  Serve it as an appetizer or turn it into the main attraction by adding some crusty bread and a small side salad.

Roasted Cauliflower Soup with Truffle Oil
(serves 4-6)

1 head cauliflower, cut into florets
3 Tbs olive oil, divided
salt and pepper
1 medium onion, chopped
2 garlic cloves, minced
4 cups water
2 cups milk
1/2 Tbs sugar
4 oz wild mushrooms sautéed in 1 Tbs butter
sour cream (or greek yogurt or creme fraiche) (optional)
truffle oil (not optional…)

Preheat the oven to 400 degrees.  Toss cauliflower in 2 Tbs olive oil, salt and pepper.  Roast for 30-40 minutes, until browned.   Set aside.

Heat a large pot or dutch oven on the stove over medium-high heat with the remaining 1 Tbs olive oil.  Add the chopped onions and sauté until translucent, about 5 minutes.  Add the garlic and cook for 1 more minute before adding the roasted cauliflower.

Add the water, milk and sugar and bring to a boil.  Reduce heat to low and simmer for 5 minutes.  Allow to cool for 10-15 minutes (or risk burning yourself while pureeing).  Puree with immersion blender or in batches in a food processor until smooth.  Return soup to dutch oven, reheat and add salt and pepper to taste.

Garnish with mushrooms, truffle oil, and a dollop of sour cream (or greek yogurt/creme fraiche) if desired.


Happy 2015!

2014 has been good to me:  I finished my third year of residency, started a research fellowship, and reclaimed by social life!  I picked up a new and exciting hobby (photography).  My little brother got engaged (and now I’m being FORCED to go to Paris for the wedding!) I made some new friends and rekindled relationships with old ones.  I cooked and baked A LOT of amazing food (and photographed the sh-t out of it!).

But now it is time to look forward to, hopefully, an even better 2015.

2015 will be the year I finally travel to Hawaii and return to Paris.  2015 will be the year I try to reduce my own food waste while also trying to cook more at home and eat out less (already failing this one).  2015 will be the year I finally gain some patience (maybe? I have a feeling this one will be a forever goal).  2015 will be the year I master Lightroom and improve my photography.  I could go on and on because there is always room for improvement, as doctors, daughters, sisters, bloggers, photographers, researchers, friends and people.  Happy and healthy new year to all of my readers!  Scroll below for a few of my favorite creations and photographs from last year.


8 Crazy Bites: A Kitchen Kibitz Hannukah Event

On any given night, Jeff Gabel can be found drinking craft cocktails at Trade, dining at Boston’s hottest new restaurants, or at home creating Asian/Jewish fusion dishes such as tom yum matzo ball soup or bagels with gochujang cream cheese and lox.  He may look young, but his name is rapidly rising in the culinary world of Boston, and beyond.  As evidence, he was recently named one of Zagats 30 under 30 which honors “gastronomic game changers” who are “redefining the way we eat, drink and interact with food and beverages across the U.S. – all before their 30th birthdays”.

This award comes from the success of his recent pop-up series called Kitchen Kibitz.  A former NYC resident with experience in the Jewish nonprofit sector, Jeff noticed a dearth of Jewish cuisine in the city of Boston and decided to do something about it…thus Kitchen Kibitz was born!  Kitchen Kibitz aims to put modern and new twists on classic Jewish food in different kitchens/restaurants all over Boston to help reconnect Jewish and non-Jewish locals to Jewish cuisine and traditions.  So far he has hosted several events such as ThanksGivukkah with Zagat 30 under 30 alum, Josh Lewin of Whisk, Southern Schmear with Hungry Mother’s Barry Maiden, and Land of Milk and Honey with Sofra’s Geoff Lukas.

This past Sunday was his 2nd Hannukah event where he teamed up with Stephanie Cmar (former Top Chef contestant, Zagat 30 under 30 2013, and owner of Stacked donuts pop-up) and Chef Steve “Nookie” Postal, of Commonwealth (formerly chef for the Boston Red Sox) who has his own plans to open up a Jewish inspired restaurant, Steinbones.

I had the privilege of being “hired” as the event photographer (will work for food!) and got to work “behind the scenes” as Chef Nookie and Stephanie Cmar prepared multiple variations of latkes and donuts.

The first latke was a purple carrot latke with carrot gel and persimmon.  The sweetness of the persimmon worked perfectly against the salty, fried latke, almost like a play on apple sauce.  And the colors were beautiful!

The second latke was sweet potato with smoked salmon and dill.  Again, this latke played on the sweet and savory combination, this time featuring the sweet flavor in the latke.  The smoked salmon was delicious with the perfect amount of smokey flavor.

Next came artichoke latkes with apple butter followed by my favorite latke of the night: potato latke with Nookie’s special Pastrami and whole grain mustard.  It’s not easy to find good pastrami in Boston, but this was perfection!  I can’t wait until Steinbones is open and I can eat this on a regular basis!

The last latke featured another specialty that will be a mainstay at Steinbones: brisket!  This was a smokey, perfectly tender brisket completed by  Dr. Brown’s black cherry bbq sauce and served atop a parsnip latke.

The meal was rounded out with ice cream sandwiches with hannukah gelt ice cream as well as Stephanie Cmar’s delicious donuts with Manischewitz jelly (yes Manischewitz can actually taste good!).

And of course the meal wouldn’t be complete without the specialty cocktail of the night dubbed “The Chosen One”.

Overall, it was a delicious event that redefined traditional Hannukah cuisine. Check out Kitchen Kibitz for upcoming events in the New Year and Happy Holidays to everyone!

Chocolate Truffles: Cardamom Pistachio and Mexican Hot Chocolate

The holidays always put me in the mood to make chocolate truffles.  Not only are they festive, but they make great homemade gifts!  While they may seem intimidating to make, they actually require minimal ingredients and effort…as long as you are willing to get a little messy!

The beauty of truffles is that you can make endless flavor combinations with the option to get as creative as you want.  Think mango curry truffles, mojito, honey lavender, balsamic sea salt, raspberry, mint…any flavor that comes to mind!

I, personally, like to infuse the cream with different flavors (such as the cardamom and cinnamon sticks demonstrated below) and will occasionally add other flavors directly to the ganache mixture.  While cocoa is the traditional coating for truffles, I like to have fun with different flavors and textures such as chopped nuts, coconut, or colored sugar.  Enjoy experimenting and happy holidays!

Cardamom Pistachio Truffles (makes about 10 truffles)

1/2 cup + 1/3 cup bittersweet chocolate (60-70%), chopped (or bittersweet chocolate chips)
1/2 cup heavy cream
10 cardamom pods, lightly crushed
1/3 cup roasted pistachios, finely chopped

Place 1/2 cup chopped chocolate (or chocolate chips) in a small heatproof bowl.

Heat heavy cream and cardamom pods over medium-low heat until it comes to a low simmer.  Simmer for about 5 minutes to infuse the cardamom flavor.  Strain the milk over the chopped chocolate.  Let stand for a minute and then whisk until combined into a smooth chocolate ganache.

Cover ganache with plastic wrap and let chill in the refrigerator for about 3 hours until firm enough hold its shape.  Spoon (I like to use a small mellon baller for this) out about 1 Tbs of ganache and roll into a sphere (they don’t have to be perfect, I usually aim for a “rustic” look).  Let chocolate balls chill in the refrigerator for another hour.

Now comes the messy part!  Using a double boiler, or a metal bowl set over a small pot of simmering water, melt the additional 1/3 cup of chocolate.  Roll chocolate balls in the melted chocolate either using your hands (messy option) or using 2 forks (slightly less messy) and then immediately coat in chopped pistachios.  Let truffles chill for an hour to set.

Remove from refrigerator at least an hour before serving to bring to room temperature.  Enjoy!

Mexican Hot Chocolate Truffles (makes about 10 truffles)

1/2 cup + 1/3 cup bittersweet chocolate (60-70%), chopped (or bittersweet chocolate chips)
1/2 cup heavy cream
2 cinnamon sticks
1/8 tsp cayenne pepper
ground cinnamon, optional
1/4 cup cocoa powder or hot chocolate powder

Place 1/2 cup chopped chocolate (or chocolate chips) in a small heatproof bowl.

Heat heavy cream and cinnamon sticks over medium-low heat until it comes to a low simmer.  Simmer for about 5 minutes to infuse the cinnamon flavor.  Strain the milk over the chopped chocolate.  Add cayenne pepper and let stand for a minute and then whisk until combined into a smooth chocolate ganache.  At this point, you can add some extra ground cinnamon if you wish after tasting for a stronger cinnamon flavor.

Cover ganache with plastic wrap and let chill in the refrigerator for about 3 hours until firm enough hold its shape.  Spoon out about 1 Tbs of ganache and roll into a sphere.  Let chocolate balls chill in the refrigerator for another hour.

Using a double boiler, or a metal bowl set over a small pot of simmering water, melt the additional 1/3 cup of chocolate.  Roll chocolate balls in the melted chocolate either using your hands or using 2 forks and then immediately coat in cocoa powder or hot chocolate powder.  Let truffles chill for an hour to set.

Thanksgiving Leftovers: Cranberry Ice Cream

I know all 65 of my readers have been anxiously awaiting this post after reading my Thanksgiving special.  Sorry for the delay!  Unfortunately, this post may be a little untimely as last night was probably the last night to safely eat your Thanksgiving leftovers (you can maybe take a risk and stretch it into today…).  Luckily, cranberry sauce is super easy to make (or you can always bookmark this site and save it for next year).

I follow several other cooking blogs and a few of them featured cranberry ice cream recently.  I had never had cranberry ice cream until now, but decided that it was a genius idea for using leftover cranberry sauce.  I was all about repurposing this weekend because what better way to use up Thanksgiving leftovers then to make MORE food!!!  (see pictures below of turkey soup and fried mashed potatoes).  Luckily, I have amazing friends who I coerced to come over and eat repurposed leftovers with me 🙂

The cranberry ice cream turned out to be delicious!  Obviously I started with a Jeni’s Splendid Ice Cream base and then just added my leftovers!  The milk and cream really help to mellow out some of the tartness of the cranberries to make this a sweet and festive ice cream.  You can use any cranberry sauce recipe but I have provided my orange cranberry sauce recipe below.  This would pair well with apple or pear pie, white chocolate bread pudding or just on its own, enjoy!

Cranberry Ice Cream

1/4 tsp. kosher salt
3 tbsp. cream cheese, softened
2 cups milk
1 Tbs and 1 tsp cornstarch
1 1/4 cups heavy cream
2/3 cup sugar
2 tbsp. light corn syrup
1/2 cup cranberry sauce (see recipe below)

In a large bowl, whisk together cream cheese and salt, set aside.

In a bowl, stir together 1/4 cup milk and the cornstarch; set slurry aside.

In a 4-qt. saucepan, whisk together remaining milk and the cream, sugar, and corn syrup.  Bring to a boil over medium-high heat. Cook for 4 minutes; stir in milk-cornstarch slurry. Return to a boil and cook, stirring, until thickened, about 2 minutes.

Whisk milk mixture into the cream cheese until smooth.  Next, mix in cranberry sauce.  Mixture may have some lumps from the cranberries. Pour mixture into a plastic bag; seal, and submerge in a bowl of ice water until chilled, about 30 min.

Pour mixture into an ice cream maker; process according to manufacturer’s instructions. Place into a storage container and freeze at least 1 hour before eating.

Orange Cranberry Sauce

1 12 o bag of fresh cranberries
zest and juice of 1 orange
2/3 cup sugar
1/2 tsp cinnamon
~~~~~
Bring all ingredients to a boil over medium heat in a medium sized pot.  Simmer for about 10 minutes, stirring occasionally, until most of the cranberries have broken down.  You may want to add a little water to thin the mixture out.  Remove from heat and cool to room temperature, then chill for at least an hour in the refrigerator before serving (or using for ice cream).

Happy Thanksgiving!

Happy Thanksgiving!  I hope everyone had an amazing dinner surrounded by friends and family like I did.  Thanksgiving (after Passover) is obviously one of my favorite holidays.  This year I cooked dinner for my parents and several co-workers that couldn’t make it home for the holiday.

This was a monumental year because I decided to stray from my traditional stuffed turkey breast and go all in with a 16 lb bird!  I purchased a free range fresh turkey from Misty Knoll Farms via Formaggio Kitchen and changed my turkey recipe about 5 times before I finally settled on my original recipe for roasted turkey by Ina Garten.  Ina has never steered me wrong so far so I figured her recipe would be a safe bet…especially with a stick of herb butter smeared under the skin followed by more brushed over the whole bird.  After 3 1/2 hours, my turkey was a perfect golden brown with crispy skin and tender, juicy turkey meat.

My carving skills may need some work though…

Read below for more Thanksgiving dishes and recipes (some of which you may recognize from last year or other blog posts).

The night started with some light appetizers: deviled eggs and fig and blue cheese savouries

Obviously no Thanksgiving would be complete without biscuits, especially these sage biscuits from Joanne Chang.  I topped mine with honey butter (instead of parsley butter) and served with more warm honey butter on the side (just add a Tbs or so of honey and a pinch of salt to a stick of room temperature butter and mix until combined).

I needed a cold dish for the brussel sprouts since I was tight on oven space so I turned to my favorite farm salad from Sweet Cheeks.

The meal was rounded off with stuffing, sweet corn pudding, mashed potatoes, cranberry sauce, and a spicy carrot salad.

And finally…

Dessert!!!  I possibly went a little overboard with 3 desserts: mini apple crisp pies, black bottom peanut butter mousse pie, and pumpkin cheesecake squares (not pictured).

I hope everyone had a great holiday!  Look for my next blog post on a creative way to use some Thanksgiving leftovers!

Pumpkin Pie Oatmeal Crumb Bars

It’s pumpkin season!  I’m sorry, I can’t help myself, when fall comes around I just want to go crazy with making everything pumpkin!

I made these delicious bars a few weeks ago (along with some butternut squash gnocchi that were not quite blog-worthy) and wanted to post them in time for Thanksgiving.  There are super easy and quick to make and so good that I’ve actually made them twice in the past month!

Pumpkin Oatmeal Crumb Bars

(from Cooking Classy)

For the Oatmeal Crumb:
1¼ cups all-purpose flour
1¼ cups quick oats
½ teaspoon baking soda
½ teaspoon salt
½ cup granulated sugar
½ cup light brown sugar
¾ cup unsalted butter, melted and cooled slightly
1 teaspoon vanilla extract

For the Pumpkin Pie Filling:
¼ cup granulated sugar
¼ cup light brown sugar
1 teaspoon ground cinnamon
½ teaspoon ground nutmeg
¼ teaspoon ground ginger
1 pinch ground cloves
¼ teaspoon salt
1 egg
1 egg yolk
½ teaspoon vanilla extract
1¼ cups canned pumpkin
⅓ cup evaporated milk (I’ve substituted cream or whole milk)

DIRECTIONS:

Make the Oatmeal Crumb: Preheat oven to 350 degrees F and adjust oven racks to center and upper-middle positions. Line an 8-inch square baking pan with parchment paper, allowing excess to hang over the sides; set aside.

In a medium mixing bowl, whisk together the flour, oats, baking soda and salt to combine. Add both the granulated sugar and brown sugar and mix until no clumps remain. Add the melted butter and vanilla extract, then stir with a fork until the mixture is evenly moistened. Press half of the mixture into the prepared pan and bake on the center rack for 15 minutes.

Make the Pumpkin Pie Filling: Meanwhile, in another medium bowl, whisk together the granulated sugar, brown sugar, cinnamon, nutmeg, ginger, cloves and salt. Add the egg, egg yolk and vanilla and whisk until well blended. Finally, whisk in the pumpkin, and then the evaporated milk until the mixture is smooth and thoroughly combined.

When the crust has finished baking, pour the pumpkin pie filling over the bottom crust and return it to the center rack of the oven for 15 minutes. Remove it from the oven, pinch the remaining oatmeal crumb mixture into small pieces and sprinkle over the top of the pumpkin pie filling. Return the pan to the oven, placing it on the upper-middle rack, and bake for an additional 20 to 25 minutes, until it is golden on top and the center only jiggles slightly.

Remove from the oven and allow to cool to room temperature, at least 1 to 2 hours. Then, transfer the pan to the refrigerator and chill for at least 2 hours. Cut into squares and serve. Leftovers can be stored in an airtight container in the refrigerator for up to 5 days.

A Spoonful of Lovin’ at Lovin’ Spoonfuls’ Ultimate Tailgate Fundraiser

As you may remember, several weeks ago I took 2 photography classes at the Boston Center for Adult Education (BCAE).  After the intermediate photography class with Chris Padgett, he mentioned that he may need an assistant to help with some food photography at an upcoming event.  Lucky for me, his assistant fell ill last minute and he needed a “pinch photographer”.  After learning about this amazing event, I was more than happy to fill in as amateur food photographer for the night!

IMG_4956
Ashley Stanley, Founder and Executive Director of Lovin’ Spoonfuls

Lovin’ Spoonfuls is non-profit organization founded in 2010 by Ashley Stanley to facilitate the rescue and redistribution of healthy, fresh food that would otherwise be discarded.  Lovin’ Spoonfuls works with many local grocery stores, produce wholesalers, farms and farmers markets to help provide hunger relief in the  Greater Boston area.  They have rescued over 2 million pounds of food to date!

The culinary board includes many big names from the Boston food scene such as Joanne Chang (Flour, Myers & Chang), her husband Chris Meyers (Myers & Chang), Michael Scelfo (Alden and Harlow) and Jamie Bissonnette (Toro and Coppa) amongst others.  This was the 4th year of their large fundraising event, aptly named “The Ultimate Tailgate”, consisting of multiple auctions, raffles, a DJ and delicious food from about 20 Boston area restaurants.

The event was held outside in a large, heated tent at Sam’s at Louis with a gorgeous view of the waterfront.

As you can imagine, I was in foodie heaven!  Not only did I get to sample appetizers from some of my favorite restaurants, but I also had the opportunity to meet many of the chefs and unabashedly take photos because it was my “job”…and all for a good cause!  Below are many of the food offerings from the night.

Tiffani Faison’s (Sweet Cheeks) shrimp boil was my favorite dish of the night.

Not only do I love shrimp (and corn, potatoes, sausage and butter) but the display was so fun and colorful to photograph…not mention that Tiffani is super nice and makes incredible biscuits!

The most interesting dish award went to Mei Mei for their Kung Pao Curry Frito Pie.  Warning: fritos and any food that accompanies them may be highly addicting!

The beet tartare pictured above from Fairsted Kitchen was a play on deviled eggs.  The simple combination of deviled eggs and sweet roasted beets was delicious and had me coming back for seconds!  I’m going to have to figure how to make these- they would be an excellent appetizer at a holiday party.

In between preparing food, socializing and eating, the chefs also did a little goofing around!

Beverages included beer by Peak Organic Brewing Company, wine by distributor M.S. Walker, as well as signature cocktails from Sam’s.

One of the more creative dishes was the chorizo, potato and squid quesadilla from relative newcomer on the Boston dining scene, La Brasa.

At one point during the night I was surrounded by the intoxicating aroma of fried chicken, only to find myself next to these mouthwatering duck drummettes with  red plum balsamic glaze from Sam’s at Louis.  If I hadn’t been so full by this point (it’s easier to eat and photograph at the same time than you think) I would have taken at least seconds…and maybe even thirds.

Bergamot served a deliciously tender brisket over a bright and acidic red cabbage slaw.

Nebo was so popular with their Italian sausage, rustic broccoli rage-pine nut pesto and provolone sandwich that they ran out of sausage by the end of the night!

Merrill & Co. served up large meatballs slathered in a robust tomato sauce and topped with parmesan cheese and bread crumbs.

And finally, no food event with Joanne Chang would be complete without dessert!

I’m not about to quit my day job but it was pretty fun being a photographer for the night!  (Hopefully I get “hired” for another gig soon!)

If you would like to learn more about Lovin’ Spoonfuls or donate to this wonderful cause, please click here.

Mini Apple Crisp Pies


Sometimes in life we are forced to make hard decisions… like should I make one large apple pie or individual mini apple pies?  Should I add a scoop (or 2) of ice cream to said pie/mini pies? (Should I operate on this patient or just observe him/her?)  Luckily, I have some amazing friends who help me make these tough decisions (regarding the pie, not operating) and even volunteer to taste test!  So recently when faced with this overwhelming dilemna, individual mini pies won out!

What’s great about mini pies is that they substantially increase the crust to filling ratio.  I don’t know about you, but my favorite part of pie is usually the crust (and depending on the type of pie, the crumble topping, or whipped cream, or chocolate, or…you get the point: pie is just kinda awesome).

These mini pies take things a step futher by adding a crisp topping and finally drizzling with icing.  For those who cannot decide between eating apple pie and apple crisp, this is your answer.  I definitely plan to keep this recipe in my arsenal for future fruit pies (there are endless possibilities with just minor changes to the recipe).  Enjoy!

Mini Apple Crisp Pies

(males about 18, recipe adapted from Girl versus Dough)

For the crust:
1½ cups all-purpose flour
1 cup whole wheat flour
1 tablespoon granulated sugar
1 teaspoon salt
2 sticks chilled unsalted butter, cut into small cubes
½ cup ice-cold water

For the crisp topping:
¾ cup old-fashioned rolled oats
6 tablespoons brown sugar
2 tablespoons all-purpose flour
¼ teaspoon cinnamon
Pinch salt
4 tablespoons chilled unsalted butter, cut into small cubes

For the apple filling:
¼ cup granulated sugar
2 tablespoons brown sugar
1 tablespoon all-purpose flour
Pinch nutmeg
1/2 tsp cinnamon
1½ teaspoons lemon juice
1½ lbs sweet-tart apples, peeled, cored and thinly sliced

For the maple icing:
1 cup powdered sugar
1/4 cup maple syrup

To make the pie dough: Combine flours, sugar and salt in a food processor . Add butter cubes and pulse until the mixture resembles coarse crumbs.

Pour ice-cold water into mixture in bowl; pulse until a rough dough forms.

Turn dough out onto a countertop and knead a few times until dough comes together; divide in half and shape each half into a ball. Flatten each ball into a 1-inch thick disc. Cover tightly with plastic wrap and chill in fridge 1 hour.

Meanwhile, make the crisp topping: In a large bowl, combine oats, brown sugar, flour, cinnamon and salt. Cut in butter with fingers and mix until well combined. Alternatively, you can do this in a food processor by pulsing all the ingredients until combined.  Chill mixture until pie dough is fully chilled and ready to bake.

To make the apple filling: In a large bowl, combine sugars, flour, nutmeg and lemon juice. Add apple slices and toss until well combined.

Heat oven to 375 degrees F.

When pie dough is fully chilled, sprinkle a countertop generously with flour, then roll out each pie dough disc to a rough ⅛-inch thickness. Use a 4-inch round biscuit or cookie cutter to cut out dough rounds; re-roll scraps one time to cut out more rounds (you should end up with about 18 rounds).

Press each round into the bottom and sides of an ungreased muffin cup.

Divide apple filling among muffin cups (the filling will be a bit mounded, but it’ll bake down). Sprinkle tops evenly with oatmeal cookie topping.

Bake 40 minutes until topping is golden brown and pie crust is baked through.

Cool mini pies in muffin cups 30 minutes, then use a butter knife or spatula to carefully transfer pies to a cooling rack to cool completely.

Combine maple syrup and powdered sugar in a small pot over medium/low heat and stir until sugar combined and disolved.  Drizzle icing immediately over fully cooled pies.

Farmer’s Market Photography Class

Apparently, most people (aka people with 9-5ish type jobs) have hobbies…or things they are interested in that have nothing to do with their career!  After working 80+ hours/week for the past 3 years, this concept, understandably, is a little foreign to me.  Yes, I do enjoy cooking, baking and blogging. Some might consider these “hobbies,” but I never quite had the time (or money) to explore this much outside the comfort of my own home.  In fact, my lack of time for hobbies/a social life got a little awkward when I went on a few first dates. The conversation often went something like this:

Boy: “So what do you do for fun?”
Me: “Well I’m pretty busy with work and saving lives, but I like to cook and bake when I can and I also have a baking blog.”
Boy: “Oh cool, what else do you do?”
Me: “Well….I guess I go to the gym occasionally?”
Boy: “What else?”
Me: “Ummmmm, I sleep every once in a while…”
Boy: “But you must have other things you like to do outside of work?  Hiking? Skiing? Going to concerts? You should come with me to this workout group that meets every morning at 6AM…maybe on slow day like a Friday?”
Me:  “Beep, beep, beep” (fakes “stat” page, stage exit right)

In an effort to have something to answer to first date questions like this…and to make the most of my time off (I mean research) I’ve been trying to develop some hobbies, mainly photography.  As you have seen on my blog (hopefully), I’ve had a mildly successful introductory foray into photography through photographing food porn for my blog.  However, I wanted to a) learn how to use the many functions on my DSLR camera and b) expand my subject matter a bit.  So this past weekend I took two photography classes at the Boston Center for Adult Education (BCAE):

Intermediate Photography with Chris Padgett

and

Farmer’s Market Photography with Brian Samuels

The first class was a technical class on how to use your camera and get the most out of all of its functions.  I definitely learned a few key things that will help my photography going forward.  In the second class, I got to apply what I learned with Chris, by going on a field trip of sorts with Brian and a group of eager new photographers to the SOWA market in the South End.  The market, bustling with food and fresh produce vendors, consumers, pets, arts and crafts and antiques, was the perfect place to work on composition and creativity.  It was a gorgeous day and if you’re going to be that sketchy person with a camera peeping out of the bushes (or tomatoes, gourds or flowers), it’s best to have a group with you!

Below are some of my favorites from the day.

Gorgeous purple radishes at a local farm vendor.


Some more local produce.  It’s fun to experiment with post-production editing.  I’ve been using the snapseed app on my iphone for much of my editing (I can instantly send photos from my camera to my iphone via wifi).  Color splash is another fun app that allows you to focus on one (or two) colorful objects to really highlight it, like the carrots above.

The market is also full of interesting people to (stealthfully) photograph.

Don’t forget to stop by Union Square Donuts for delicious fresh donuts in a variety of flavors (like brown butter hazelnut pictured above).  The wait in line is worth it!

There are a variety of non-produce items sold as well.

And finally, some more beautiful produce!

Apple Walnut Muffins

So I may have complained about the unseasonably warm weather last weekend a little too soon…in my defense my building had already turned on the heat in 80 degree weather!  Regardless, this week turned cold and rainy bringing with it a craving for warm and comforting fall flavors…and perhaps a touch of early seasonal depression.

Luckily, I still had a lot of apples left from a recent apple picking trip to Russell Orchards that were begging to be baked into a delicious new treat.

Back in college I created (and perfected) my first ever recipe, Apple Cinnamon Chip Bread (or muffins).   Since my local Whole (Paycheck) Foods doesn’t sell Hershey’s cinnamon chips, I decided to modify it a bit by using walnuts for a contrasting texture element and topping with a maple glaze and more walnuts.  Warning: your kitchen will smell like an apple pie and you’ll immediately want to eat all the muffins when they come out of the oven!

The apples, walnuts and cinnamon are almost reminiscent of chariest (a traditional apple, walnut and wine mixture served at Passover to remind us of our ancestors) minus the sickeningly sweet Manischevitz wine.  The maple glaze takes it a step further by adding an extra touch of New England fall flavor before being topped with more toasted walnuts.

You may be asking, do I need to toast my walnuts?  Yes, the answer is yes.  ALWAYS toast your nuts (sorry just had to say that).  Toasting any nut brings out it’s flavor and gives it more texture which is ideal for baking.  Click here for several methods that can be used.  Just be careful not to let them burn!  (No one likes burnt nuts…too far?)

(Here is a brief guide to help choose the best apples for baking.)

Apple Walnut Muffins

(makes 12 muffins)

4 Tbs butter, melted
3/8 cup white sugar
3/8 cup brown sugar
1 egg
1/2 cup peeled and chopped apple
1/2 cup pureed apple or unsweetened apple sauce
1 cup old fashioned oats
3/4 cup flour
1 tsp cinnamon
2 tsp baking powder
1/2 tsp baking soda
1/2 tsp salt
1/2 cup toasted walnuts plus another 1/2 cup toasted walnuts for the glaze

Maple Glaze
1/4 cup real maple syrup
1 cup powdered sugar
1 Tbs butter

Preheat oven to 350 degrees. Line 12 muffin tins with paper liners and spray with non-stick spray.

In a large mixing bowl, combine butter, white sugar and brown sugar. Mix until mixture is smooth. Beat in egg. Stir in chopped apples and pureed apples (or apple sauce) until well mixed.

In a separate bowl, combine oats, flour, cinnamon, baking powder, baking soda, and salt. Gradually incorporate into the apple mixture. Stir in 1/2 cup walnuts.

Divide batter evenly into the 12 muffin cups. Bake for 20-25 minutes or until golden brown on top and a toothpick inserted into the center comes out cleanly. Let cool.

Make the maple glaze by heating all ingredients in a small saucepan over medium heat and whisking until the powdered sugar is dissolved.  Drizzle immediately over muffin tops and top with toasted nuts.  The glaze hardens quickly so make sure to top with walnuts immediately or else the glaze will harden and the walnuts will not stick.  Enjoy!

Shanah Tovah: Rosh Hashanah Dinner

Despite the balmy 80 degree weather this weekend in New England, fall is upon us.  And with it comes apple picking, pumpkin everything, and the Jewish high holidays.  While no one really looks forward to Yom Kippur (although it is fun to stuff your face with bagels and lox after 24 hours of fasting…and I suppose to pray and ask for forgiveness), Rosh Hashanah is always an exciting holiday.  Rosh Hashanah is the Jewish new year and also the anniversary of the creation of Adam and Eve.  There are a lot of religious customs but what most people remember and look forward to is the tradition of eating apples dipped in honey to welcome in a “sweet new year”.

While the main event of this holiday is praying and reflecting at synagogue, blowing the shofar, and beginning the first of ten days of repentance, the celebratory meal often takes central focus.  I have been hosting Rosh Hashanah dinner for the past several years for my busy co-workers and friends who often don’t have time to make it to a synagogue or celebrate the New Year.  It’s a way to get my close friends together to celebrate Rosh Hashanah in our own way (with good food!).

Scroll down for pictures from this year’s dinner along with some recipes.  L’shanah tovah!

Rosh Hashanah cocktail from Union Square Cafe in NYC.

Ronda’s Challah

(This recipe is from my childhood best friend’s mom, you won’t find a better challah around!)

1 cup very warm water
½ cup vegetable oil
½ cup honey
1 egg
1 tsp salt
4 cups flour
1 package Fleishman’s rapid rise yeast (important that this be rapid rise and not active)
1 egg
sesame seeds (optional)
2 apples chopped, cinnamon and honey (optional for making apple and honey challah)

Add the first 6 ingredients into a bread machine in order listed. Make a hole in the top of the flour and add the yeast. Set bread machine to dough cycle (approximately 1 to 1.5 hours depending on the machine). Take out dough and place on well floured surface. Punch down the dough several times and then make into 3 ropes. Braid the challah and place on greased baking sheet. If you want to make apple and honey challah then roll challah into one long rope, flatten and stuff with a mixture of apples, honey and cinnamon.  Roll into a bun shape.  Cover challah with towel and let rise for 1-2 hours. Beat egg and paint onto challah. Sprinkle with sesame seeds if desired. Bake in preheated 350˚F oven for 30-40 minutes or until golden brown.

Recipe for spiced brisket with apricot and leeks.

I have been making this recipe for almost 8 years and it is always a hit!  I’ve found that it is best to start it 2 days ahead of time and cook it the day before- leftover brisket always tastes better!

Now to the desserts…

Peanut swirl brownies

Rich and fudgey brownies with peanut butter, proclaimed by some to be the “best brownies in the world”!  I cut the recipe by half and make it in a 9×13 inch pan.  Be careful not to over bake!

Apple Crunch Galette that I served with lavender goat cheese honey ice cream.  The ice cream is a spin on the honey ice cream I made last year with an added twist:  I infused the milk/cream with dried lavender and substituted the cream cheese for 2 oz of goat cheese.

Apple Crunch Galette

(from the Kosher by Design cookbook)

Crust:
2 1/2 cups all-purpose flour
1 1/4 tsp salt
2 Tbs sugar
2 sticks (1 cup, 16 Tbs) unsalted butter, cold, cut into about 8 pieces
4-5 Tbs ice water

Streusel:
3/4 cup all-purpose flour
3/4 cup light brown sugar
1/2 cup old fashioned oats (not quick cooking or instant)
6 Tbs melted butter

Apple Filling:
5-6 medium apples
1/2 cup sugar
3 Tbs all-purpose flour
1 tsp cinnamon
1/8 tsp salt
3 Tbs apricot preserves
1 egg yolk, beaten with 1 tsp water or milk

For the crust:

In a food processor, pulse flour, salt, and sugar 2-3 times until mixed.  Add the diced, chilled butter.  Pulse until mixture resembles peas.  Add the ice water 1 Tbs at a time until the dough comes together.

Turn dough out onto a piece of plastic wrap or parchment paper.  Knead briefly to bring together in a ball and flatten slightly into a disc.   Refrigerate for 30 minutes in the refrigerator.

For the streusel:

In the meantime make the streusel by combining all ingredients in a small bowl and mixing with a fork until it comes together.  Set aside.

For the apples:

Peel, seed and slice the apples.

In a large bowl, combine the apples, flour, sugar, cinnamon and salt.  Toss gently to coat.  Set aside.

To assemble the crostata:

Preheat the oven to 375.  Remove the dough from the refrigerator and set on a lightly floured piece of parchment paper.  Roll the dough into a 14-15 inch circle.

Leaving a 3 inch border, spread the apricot preserves over the center of the dough.  Sprinkle evenly with 3/4 of streusel topping.  Next, starting at the outer edge and working your way into the center, lay the apple slices in concentric circles, going around and adding layers until the apples are used.  Sprinkle with remaining streusel.  Using the parchment to help, fold the dough border over the apples, turning as needed.  The dough will cover 2-3 inches of filling.  Slide crostata carefully on the parchment paper onto rimless baking sheet.  Brush exposed dough with beaten egg yolk.

Bake for 25 minutes.  Remove from oven and carefully cover dough with foil to prevent burning.  Bake for another 20-30 minutes until crust is golden brown and apples are tender.  Let cool for about an hour before cutting and serving.

And finally, what to do with leftovers..

brisket hash…

or…

Challah french toast with apple syrup! 

Cooking Lessons: Curry Risotto with Tandori Chicken

My cooking lessons continued last week with a slightly more complicated dish.  My friend had just gotten back from vacation and had tried an unusual dish while abroad: chicken curry risotto.  I love risotto and I love Indian food so it made perfect sense to combine these two into one dish: Italian-Indian fusion? Might just be the next new thing…

Risotto is classic Italian comfort food.  It is a rice dish from northern Italy that is cooked slowly until it develops a creamy consistency.  For those who like to constantly be doing something while they cook, this is the dish for you.

It starts by sautéing an aromatic element such as onion and garlic- we also used ginger to add an Indian flavor.  You then add the arborio rice (a short grain rice with capacity to absorb a lot of liquid) and wine to deglaze the pan.  Once the wine has reduced the fun begins!  Little by little, you add broth to the pot and stir constantly until all the broth is absorbed.  You repeat this process until the rice is “al dente” and creamy.

We made a curry broth by adding spices to chicken broth but you can use any flavor variation to make a risotto of your choice: vegetable, beef, mushroom, seafood, etc.  Oftentimes the risotto is finished off with lemon juice, cheese (goat cheese, parmesan, blue cheese), fresh herbs, or cream.  Make sure to season as you go and serve immediately or else the risotto will continue to cook and become a mushy mess! (and if you have any leftovers save it to make arancini the next day!)

Curry Risotto with Tandori Chicken

(serves 6)

For the Tandori Chicken (from Fine Cooking):

8 bone-in chicken thighs
1 cup plain nonfat yogurt
1/3 cup fresh lemon juice (from about 2 medium lemons)
1 Tbs. peeled and finely chopped fresh ginger
1 Tbs. finely chopped garlic
2 tsp. ground coriander
2 tsp. ground cumin
2 tsp. garam masala
1-1/2 tsp. kosher salt
1/2 tsp. cayenne
1 lemon, cut in half

For the curry risotto:IMG_1377

6 cups of chicken broth
1 can (14 oz) coconut milk
3 Tbs curry powder
1 tsp cumin
1/4 tsp cinnamon
5 Tbs tomato paste
2 Tbs sugar
4 Tbs butter, divided
1 Tbs olive oilIMG_1374
1/2 of a sweet onion, chopped
2 garlic cloves, minced
1 Tbs ginger, minced
1 cup mushrooms, sliced
2 cups arborio rice
1/4 cup dry white wine
1/2 lemon, juiced
salt and pepper to taste
cilantro, chopped for garnish (optional)

For the Tandori chicken:

Remove the skin and trim excess fat from the chicken. With a sharp chef’s knife, cut three or four long, diagonal slits on each thigh against the grain, almost to the bone.

In a large, shallow bowl, mix together the yogurt, lemon juice, ginger, garlic, coriander, cumin, garam masala, kosher salt, and cayenne. Add the chicken, turning to coat and making sure that the marinade gets into all of the slits in the chicken. Cover and marinate in the refrigerator, at least 2 hours and up to 12 hours.

Position a rack in the center of the oven and heat the oven to 375ºF. Line a large rimmed baking sheet with foil. Transfer the chicken from the marinade to the baking sheet, spacing the thighs evenly. Discard any remaining marinade. Roast until the juices run clear when the chicken is pierced and an instant-read thermometer in a meaty part of a thigh registers 170°F, about 45 minutes

Squeeze the lemon halves over the chicken. Let it cool for about 20-30 min before using for the risotto. (may be refrigerated at this point if making ahead) Once cooled, remove chicken from bones and cut into bite sized pieces.

For the curry risotto:

Make the broth by adding the chicken broth, coconut milk, curry powder, cumin, cinnamon, tomato paste, and sugar into a medium pot and whisking until blended.  Heat to a simmer and cover.

Meanwhile, heat 2 Tbs butter and the olive oil in a dutch oven over medium-high heat.  Add the onions and cook until translucent, about 5 minutes.  Add the garlic and ginger and cook, stirring, for about 1 minute.  Add the mushrooms and cook for another minute.  Add some salt and pepper to taste (I like to season as I go to add layers of flavor).

Add the rice to “toast” it, and stir for about 1 minute.  Add the white wine and let reduce for about a minute, while stirring constantly.  Reduce heat to medium-low.  Ladle about 1 cup of the curry broth into the rice and simmer until absorbed, stirring frequently.  Once the liquid is absorbed, continue adding broth, a 1/2 cup at a time, allowing broth to be absorbed before adding more, stirring frequently the whole time.  Continue this until rice is creamy and tender, and most of the broth (if not all) is used, about 25-30 minutes.

Stir in lemon juice, remaining 2 Tbs butter , salt and pepper to taste and finally the chicken to rewarm it.  Serve immediately and top with cilantro.

Edible Exposure: Food and Photography Class

I think I’ve missed my calling: food photography (aka food pornographer).  As I mentioned in my last post, my research fellowship has given me quite a bit of free time that I have been filling with both old (cooking/baking/eating) and new (photography) hobbies.  In my quest to completely fill my free time with something meaningful, I turned the to Boston Center for Adult Education’s (BCAE) fall curriculum of food related classes.  I had taken a few classes at their old location on Commonwealth Ave. but had not had the time to try out a class at their gorgeous new space on Arlington St.  I was excited to see that they had a “celebrity chef” series with well-known Boston area chefs taking charge of the classes.  I was of course immediately drawn to the class entitled Edible Exposure: Food and Photography with Michael Scelfo.  Not only did I want to learn more about food and photography, but Michael Scelfo is the owner and chef at one of my favorite local restaurants, Alden and Harlow, nominated for one of Bon Appetit’s best new restaurants of 2014.  I immediately signed up and was lucky to get a spot in this intimate class for 12.

The class started on a Tuesday evening at 6PM and we were greeted by representatives from 90+ Cellars wine who immediately poured us glasses of wine, picked especially for this dinner.  Once we were settled in (and slightly more relaxed), Michael gave a brief overview of food photography.  The class was geared towards using an iPhone (or smart phone) and various iPhone apps to edit the photos.  I, of course, couldn’t resist bringing my new “toy” (Nikon D5300) but learned a lot about different apps that can be used to edit the photos. I was pretty impressed that he does all the photography and editing that he posts on social media himself (Twitter: @mscelfo, @aldenharlow; Instagram: @mscelfo, @aldenharlow)- he takes some amazing food photos!

He then introduced his 2 sous chefs that he brought along to make our dinner that night.

On the menu:

I’ll admit, I was a little disappointed that we didn’t actually get to make any of the dishes (or at least get the recipes!), but it would have been an ambitious feat for a 3 hour class.  Plus, how can you complain about a private dinner and photography lesson (with wine) from Michael Scelfo?

The first dish was the spicy shishito peppers…and spicy they were!  Normally 1 in 10 peppers are spicy but I got “lucky” and at least 75% of mine were hot!!!!  For this photo with lots of shades of green, he showed us how to improve it’s appearance by turning down the “warmth” feature in Instagram. Decreasing the warmth brought in more blue tones to deepen the green color.

The next course was the charred broccoli with squash hummus.

This may have been my favorite dish of the night.  (My next mission will be to try to recreate that hummus!)  With this dish, he showed us how to use the app “color splash” which allows you to highlight one or two colors in a photo while leaving the rest black and white to really emphasize the main focus of the photo (in this case the food).

(photo courtesy of Michael Scelfo)

The final dish was the trenne pasta (a triangle shaped penne type pasta), a new menu item at Alden and Harlow.  The pasta was perfectly cooked and paired with guanciale, cherry tomatoes and finally anchovy crumbs for a texture contrast and umami type flavor.  This dish was full of color and therefore perfect for photos.  After taking photos of this final course, he showed us how to use the app “pic frame” to create a collage of the night’s dishes (see above).

Overall, this was a super fun (and tasty) class full of great food and helpful photo tips.  I can’t wait to try them out for my blog photos…and to return to Alden and Harlow for the amazing food!

Rustic Peach Crostata


This July I started a 2 year hiatus from the craziness of residency to pursue a research fellowship in surgical oncology.  It has been quite an adjustment to go from running around the hospital for 24 (often 30) hours straight without eating, drinking or sleeping to sitting at a desk and reading and entering data.  I also get to wear “normal” clothes now (aka not scrubs) and people around the hospital no longer recognize me (I’m not sure what this says about my general appearance for the past 3 years…).  This “slower” pace of life as given me A LOT more free time that I have been filling with spinning and barre classes, cooking/baking, going to the beach, exploring as much of the Boston restaurant scene as my waistband and wallet will allow, and catching up with friends I’ve neglected for the past 3 years.  But alas, I decided I still didn’t have enough to do so I decided to pick up a fancy new hobby- photography!

I have always had an interest in photography and took a black and white photography class in high school where we developed our own prints.  However, recently my idea of photography has been my iPhone and instagram.  While I have taken some great pictures this way, I decided it was finally time for an upgrade.  For my 30th birthday present, my parents and I joined forces to purchase a DSLR camera.  After much research, I settled on the Nikon D5300- a compact and relatively lightweight, higher end entry-level DSLR camera.

I’ve been experimenting with it for the past week all over Boston and so far I love it!


After a week of experimentation, I decided it was finally time to put it to the test for my blog.  I threw around a few ideas for my camera’s debut blog entry and finally settled on something that was both seasonal and aesthetically pleasing: a rustic peach crostata. Not only were the peaches fun to photograph, but the spiral design of the crostata, which gets hidden a bit in the final product, is actually quite beautiful.

What’s great about crostatas is that if you have trouble with pie crusts (like I do), you don’t have to worry- the whole point of the crostata is to look a bit rustic and imperfect.  This recipe is adapted from an apple crostata recipe that actually comes from a Kosher cookbook (Kosher by Design).  Feel free to substitute other firm fruits (such as apples, pears, plums) for a variation.  My favorite thing about this recipe is that it adds a streusel layer (both on the bottom and top) for extra crunch and flavor (mmmmmm butter and brown sugar).  It is best served warm with a side of ice cream (try corn, mascarpone, or salted caramel ice cream to create an interesting flavor contrast).

Rustic Peach Crostata

(adapted from Kosher by Design)

Crust:
2 1/2 cups all-purpose flour
1 1/4 tsp salt
2 Tbs sugar
2 sticks (1 cup, 16 Tbs) unsalted butter, cold, cut into about 8 pieces
4-5 Tbs ice water

Streusel:
3/4 cup all-purpose flour
3/4 cup light brown sugar
1/2 cup old fashioned oats (not quick cooking or instant)
6 Tbs melted butter

Peach Filling:
5-6 peaches medium peaches (6 if you’re like me and eat about the equivalent of one peach in peach slices that weren’t pretty enough to photograph)
1/4 cup sugar
4 Tbs all-purpose flour
1/4 tsp ginger
1/8 tsp salt
3 Tbs apricot preserves
1 egg yolk, beaten with 1 tsp water or milk

For the crust:

In a food processor, pulse flour, salt, and sugar 2-3 times until mixed.  Add the diced, chilled butter.  Pulse until mixture resembles peas.  Add the ice water 1 Tbs at a time until the dough comes together.

Turn dough out onto a piece of plastic wrap or parchment paper.  Knead briefly to bring together in a ball and flatten slightly into a disc.   Refrigerate for 30 minutes in the refrigerator.

For the streusel:

In the meantime make the streusel by combining all ingredients in a small bowl and mixing with a fork until it comes together.  Set aside.

For the peaches:

Peel, pit and slice the peaches.

In a large bowl, combine the peaches, flour, sugar, ginger and salt.  Toss gently to coat.  Set aside.

To assemble the crostata:

Preheat the oven to 375.  Remove the dough from the refrigerator and set on a lightly floured piece of parchment paper.  Roll the dough into a 14-15 inch circle.

Leaving a 3 inch border, spread the apricot preserves over the center of the dough.  Sprinkle evenly with 3/4 of streusel topping.  Next, starting at the outer edge and working your way into the center, lay the peach slices in concentric circles, going around and adding layers until the peaches are used.  Sprinkle with remaining streusel.  Using the parchment to help, fold the dough border over the peaches, turning as needed.  The dough will cover 2-3 inches of filling.  Slide crostata carefully on the parchment paper onto rimless baking sheet.  Brush exposed dough with beaten egg yolk.

Bake for 25 minutes.  Remove from oven and carefully cover dough with foil to prevent burning.  Bake for another 20-30 minutes until crust is golden brown and peaches are bubbling.  Let cool for about an hour before cutting and serving.

Blueberry Muffins with Streusel Topping

After a day at the beach followed by a night drinking rosé at a rooftop bar, it can be hard to wake up at 5AM for a 24 hour Sunday shift at the hospital.  Luckily, freshly baked blueberry muffins make everything (a little) better.  These muffins are adapted from Joanne Chang’s Flour bakery cookbook but I added a streusel topping for an extra special morning treat (and because everyone needs a little extra butter and sugar in the morning!).  The flavor of these muffins is also enhanced by the addition of lemon zest and cinnamon- subtle, yet an excellent complement to the sweet and tart blueberries.  These were definitely a bright spot in a hectic morning and it was only a matter of hours before they were polished off!

Blueberry Muffins with Streusel Topping

(adapted from Joanne Chang’s Blueberry Muffins)
(makes 18 muffins)

For the muffins:

Vegetable oil or cooking spray for the pan
3-1/2 cups unbleached all-purpose flour
4 tsp. baking powder
1/2 tsp. baking soda
1/2 tsp cinnamon
1/2 tsp. table salt
1-1/3 cups granulated sugar
5 oz. (10 Tbs.) unsalted butter, melted and cooled slightly
1 cup whole milk, at room temperature
1 cup crème fraîche or sour cream, at room temperature
2 large eggs, at room temperature
1 large egg yolk, at room temperature
2 tsp. finely grated lemon zest
1-1/2 cups fresh (washed, dried, and picked over) or frozen (no need to thaw) blueberries

For the streusel topping:
3/8 cup flour
1/4 cup sugar
1/8 cup brown sugar
1/4 cup old fashioned oatmeal
pinch of salt
1/2 stick (or 4 tbs) cold un-salted butter, diced

Position a rack in the center of the oven and heat the oven to 350°F. Lightly oil (or spray with cooking spray) the top of a standard 12-cup muffin tin and then line with paper or foil baking cups. (Spraying the pan keeps the muffin tops from sticking to the pan’s surface.)

In a large bowl, sift together the flour, baking powder, baking soda, cinnamon, and salt; mix well. In a medium bowl, whisk the sugar, butter, milk, crème fraîche or sour cream, eggs, egg yolk, and zest until well combined.

Pour the wet ingredients into the dry and fold gently with a rubber spatula just until the dry ingredients are mostly moistened; the batter will be lumpy, and there should still be quite a few streaks of dry flour. Sprinkle the blueberries on the batter and fold them in until just combined. (The batter will still be lumpy; don’t try to smooth it out or you’ll overmix.)

If you have an ice cream scoop with a “sweeper” in it, use it to fill the muffin cups. Otherwise, use two spoons to spoon the batter in, distributing all of the batter evenly. The muffin cups should be filled to the top.

Combine all streusel ingredients in either a food processor or small bowl.  If using a food processor, pulse until ingredients come together in pea sized pieces and mixture is crumbly.  If you don’t have a food processor, just mix ingredients together using pastry cutter, 2 forks or fingers until you achieve that crumbly texture.

Sprinkle the streusel topping evenly over the tops of each muffin.

Bake until the muffins are golden brown and spring back lightly when you press the middle, 30 to 35 minutes. (The muffin tops will probably meld together.) Let the muffin tin cool on a rack for 15 to 20 minutes. Use a table knife to separate the tops, and then remove from the pan.

Cooking Lessons: Seared Ahi Tuna Salad

I am often approached by friends asking for cooking or baking lessons.  While this sounds like a good idea in theory, I must admit, I’m a little “Type A” in the kitchen which can make relinquishing control to a new “student” a little difficult (especially if I plan on taking beautiful pictures for a future blog post!).  However, I decided to give it a shot for once.  My friend requested learning how to make something relatively simple but “healthy”.  Now those of you who follow my blog (or who have been lucky enough to sample my culinary masterpieces) may laugh at the idea of me making anything healthy, but I promise you it is possible!  This salad was inspired by the seared tuna salad at the Hillstone with some minor variations to suit my picky friend.

Below are some of the basic techniques, definitions, and tips I taught my friend in order to compose this salad:

Chopping– When food, generally vegetables/herbs, are cut into smaller uniform pieces but not as small as if it were minced (see next)

Mincing– Cutting food, such as garlic or ginger, into the tiniest pieces possible

Julienning– This refers to cutting food, generally vegetables such as carrot or zucchini, into long match-stick like pieces.  Often used to cut vegetables for a slaw. You can do this by hand (which is tedious), use a special mandolin grater, or buy a special julienning vegetable peeler.

Searing-This is when food, such as meat or fish (aka tuna) is cooked over really high heat to get a nice sear or caramelization on the outside of the meat.  

Vinaigrette- Generally this refers to a salad dressing but it can also be used as a marinade.  It is typically composed of 2 parts oil to 1 part vinegar or acid.  I generally use citrus juice or other vinegars (balsamic, sherry, champagne) for my acid and olive oil for my oil.  In the following Asian inspired vinaigrette I also introduced soy sauce and rice wine vinegar for some acidity and sesame oil.  It is also great to balance out the flavor with some sweetness from honey.  You can use sugar too but the honey also acts as an emulsifier to bring your vinaigrette together (dijon mustard also works as an emulsifier).  Finally, you can add herbs and other flavors such as garlic, shallots, basil, cilantro etc.  Finish with salt and pepper to taste and test the final product by trying on a piece of lettuce dipped into the vinaigrette.

The below vinaigrette would be great on salmon, chicken or shrimp.  You can also add different vegetables (red pepper, snap peas) or fruit (mango, mandarin wedges) to the salad as you please.

While the lesson somewhat deteriorated into more of a demonstration while my friend watched and drank wine, overall I’d call it a success!

Seared Ahi Tuna Salad

(serves 4)

Start by making the vinaigrette to the give the flavors time to marinate together.

Cilantro, Honey, Lime Vinaigrette 

1/4 cup fresh squeezed lime juice
2 Tbs soy sauce
1 Tbs sesame oil
1 Tbs rice wine vinegar
3 Tbs honey
1 Tbs freshly minced ginger
1/4 cup cilantro, chopped
1/2 cup olive oil

Whisk the first 5 ingredients (lime juice through honey) in a medium bowl.  Mix in the ginger and cilantro.  Slowly whisk in olive oil until thoroughly emulsified.  Taste to see if you need salt- because of the soy sauce you may find you don’t need it.  Allow to sit while you prepare the rest of the ingredients.  You will likely need to re-whisk before serving.

Salad

8 oz of mixed baby lettuces (you can use anything you wish here although I’d recommend using against something with lots of flavor such as arugula, I used a mix of frisee and red lettuce but a pre-washed container of mixed lettuce or spinach would work just fine)
2 avocados, halved and sliced
2 tomatoes, cut into about 8 wedges each (can also use halved cherry tomatoes)
chopped cashews or nut of your choosing to top the salad

Toss the lettuce with about 3/4 of the vinaigrette.  Reserve the remaining to drizzle on the tune.  Divide the salad onto one half of 4 plates.  Top each with 1/4 of the avocado slices, tomato wedges and cashews.

Seared Ahi Tuna

4 5 oz fresh tuna steaks (each about 3/4 to 1 inch thick)
1 Tbs olive oil
1 tsp sesame oil
salt and pepper

Generously salt and pepper each side of the tuna.  Heat both oils in a 12 inch skillet on high heat until a drop of water sizzles.  Add the tuna steaks and cook until browned on each side about 1-2 minutes, so that it is still raw on the inside.

Let it rest on a cutting board for about 5 minutes.  Slice AGAINST THE GRAIN (or else it will fall apart) and place next to the salad.  Drizzle with remaining vinaigrette. Bon appetit!